Use this temp to create the link
http://ServerLocation/_layouts/FormServer.aspx?XsnLocation=http://ServerLocation/Forms/template.xsn&DefaultItemOpen=1
http://ServerLocation
/_layouts/FormServer.aspx?XsnLocation=
http://ServerLocation/Forms/template.xsn
&DefaultItemOpen=1
On wss2:
http://ServerLocation/NewForm.aspx?&DefaultItemOpen=1
Related: http://www.cleverworkarounds.com/2008/02/06/form-services-and-spd-workflows
Showing posts with label InfoPath 2007. Show all posts
Showing posts with label InfoPath 2007. Show all posts
Friday, May 7, 2010

Tuesday, March 23, 2010
InfoPath 2007 - Conditional SUM
REF: http://blogit.create.pt/blogs/miguelisidoro/archive/2008/08/02/InfoPath-2007-_2D00_-Conditional-SUM.aspx
This blog post will show you how to create an expression box in an InfoPath 2007 form whose value is based on the result of an conditional sum. Consider the following InfoPath form template:
The previous image shows a simple expense report. To support the introduction of the expense information, a Repeating Table control is used with three columns:
Expense - Expense Description. A simple Text Box control;
Value - Expense value. A simple Text Box control;
Expense Type - Drop-down List Box control that allows 4 expense types: Food, Land Travel, Air Travel and Parking.
Below the repeating table there are 5 expression boxes that show the total amount of the expense report and the total amount for each expense type. The total amount expression box is based on a simple sum expression and each of the expense type expression boxes are based on conditional sums filtered by the value of the expense type Drop-down List Box control. The expressions used for each expense type are the following:
Expression Box Expression XPath Expression
Expense Total sum(expensevalue) sum(my:accounting/my:expensevalue)
Food Expense Total sum(accounting[expensetype = "Food"]/expensevalue) sum(my:accounting[my:expensetype = "Food"]/my:expensevalue)
Land Travel Expense Total sum(accounting[expensetype = "Land Travel"]/expensevalue) sum(my:accounting[my:expensetype = "Land Travel"]/my:expensevalue)
Air Travel Expense Total sum(accounting[expensetype = "Air Travel"]/expensevalue) sum(my:accounting[my:expensetype = "Air Travel"]/my:expensevalue)
Parking Expense Total sum(accounting[expensetype = "Parking"]/expensevalue) sum(my:accounting[my:expensetype = "Parking"]/my:expensevalue)
As the previous table shows, the conditional sum expressions for each expense type are relatively simple and pretty straightforward for those who are familiarized with XPath, since XPath syntax is used for each expression. This comes as no surprise since the underlying data of the InfoPath form is stored in XML. The following image shows an expense report example filled with some sample values:
Posted: Saturday, August 02, 2008 3:52 PM by misidoro
This blog post will show you how to create an expression box in an InfoPath 2007 form whose value is based on the result of an conditional sum. Consider the following InfoPath form template:
The previous image shows a simple expense report. To support the introduction of the expense information, a Repeating Table control is used with three columns:
Expense - Expense Description. A simple Text Box control;
Value - Expense value. A simple Text Box control;
Expense Type - Drop-down List Box control that allows 4 expense types: Food, Land Travel, Air Travel and Parking.
Below the repeating table there are 5 expression boxes that show the total amount of the expense report and the total amount for each expense type. The total amount expression box is based on a simple sum expression and each of the expense type expression boxes are based on conditional sums filtered by the value of the expense type Drop-down List Box control. The expressions used for each expense type are the following:
Expression Box Expression XPath Expression
Expense Total sum(expensevalue) sum(my:accounting/my:expensevalue)
Food Expense Total sum(accounting[expensetype = "Food"]/expensevalue) sum(my:accounting[my:expensetype = "Food"]/my:expensevalue)
Land Travel Expense Total sum(accounting[expensetype = "Land Travel"]/expensevalue) sum(my:accounting[my:expensetype = "Land Travel"]/my:expensevalue)
Air Travel Expense Total sum(accounting[expensetype = "Air Travel"]/expensevalue) sum(my:accounting[my:expensetype = "Air Travel"]/my:expensevalue)
Parking Expense Total sum(accounting[expensetype = "Parking"]/expensevalue) sum(my:accounting[my:expensetype = "Parking"]/my:expensevalue)
As the previous table shows, the conditional sum expressions for each expense type are relatively simple and pretty straightforward for those who are familiarized with XPath, since XPath syntax is used for each expression. This comes as no surprise since the underlying data of the InfoPath form is stored in XML. The following image shows an expense report example filled with some sample values:
Posted: Saturday, August 02, 2008 3:52 PM by misidoro
Sunday, March 21, 2010
Calculate the difference between two date picker controls in InfoPath using rules and formulas - no code!
REF: http://www.bizsupportonline.net/infopath2007/calculate-date-difference-infopath-rules-formulas.htm
Use rules, conditions, and the number(), floor(), and substring() functions in formulas to calculate the difference between two date picker controls in InfoPath.
Problem
You have an InfoPath form template with two date picker controls and you would like to calculate the difference between the two date picker controls without writing code.
Solution
Use rules, conditions, and the number(), floor(), and substring() functions in formulas to calculate the difference between two date picker controls in InfoPath.
Discussion
You can accomplish this functionality as follows:
Design an InfoPath form template as shown in figure 1 with two Date Picker controls named startDate and endDate, and one Text Box control named difference.
Figure 1. InfoPath form template in Design mode.
The Main data source of the InfoPath form template should resemble the following figure:
Figure 2. The Main data source of the InfoPath form template.
Add the following Rule to the startDate field:
Action: Set a field's value
Field: difference
Value:
(number(substring(../my:endDate, 9, 2)) + floor((153 * (number(substring(../my:endDate, 6, 2)) + 12 * (floor((14 - number(substring(../my:endDate, 6, 2))) div 12)) - 3) + 2) div 5) + (number(substring(../my:endDate, 1, 4)) + 4800 - (floor((14 - number(substring(../my:endDate, 6, 2))) div 12))) * 365 + floor((number(substring(../my:endDate, 1, 4)) + 4800 - (floor((14 - number(substring(../my:endDate, 6, 2))) div 12))) div 4) - floor((number(substring(../my:endDate, 1, 4)) + 4800 - (floor((14 - number(substring(../my:endDate, 6, 2))) div 12))) div 100) + floor((number(substring(../my:endDate, 1, 4)) + 4800 - (floor((14 - number(substring(../my:endDate, 6, 2))) div 12))) div 400) - 32045) - (number(substring(., 9, 2)) + floor((153 * (number(substring(., 6, 2)) + 12 * (floor((14 - number(substring(., 6, 2))) div 12)) - 3) + 2) div 5) + (number(substring(., 1, 4)) + 4800 - (floor((14 - number(substring(., 6, 2))) div 12))) * 365 + floor((number(substring(., 1, 4)) + 4800 - (floor((14 - number(substring(., 6, 2))) div 12))) div 4) - floor((number(substring(., 1, 4)) + 4800 - (floor((14 - number(substring(., 6, 2))) div 12))) div 100) + floor((number(substring(., 1, 4)) + 4800 - (floor((14 - number(substring(., 6, 2))) div 12))) div 400) - 32045)
with the following Conditions on the Rule:
startDate is not blank and
endDate is not blank
Add a second Rule to the startDate field with the following settings:
Action: Set a field's value
Field: difference
Value: 0
with the following Conditions on the Rule:
startDate is blank or
endDate is blank
Add the following Rule to the endDate field:
Action: Set a field's value
Field: difference
Value:
(number(substring(., 9, 2)) + floor((153 * (number(substring(., 6, 2)) + 12 * (floor((14 - number(substring(., 6, 2))) div 12)) - 3) + 2) div 5) + (number(substring(., 1, 4)) + 4800 - (floor((14 - number(substring(., 6, 2))) div 12))) * 365 + floor((number(substring(., 1, 4)) + 4800 - (floor((14 - number(substring(., 6, 2))) div 12))) div 4) - floor((number(substring(., 1, 4)) + 4800 - (floor((14 - number(substring(., 6, 2))) div 12))) div 100) + floor((number(substring(., 1, 4)) + 4800 - (floor((14 - number(substring(., 6, 2))) div 12))) div 400) - 32045) - (number(substring(../my:startDate, 9, 2)) + floor((153 * (number(substring(../my:startDate, 6, 2)) + 12 * (floor((14 - number(substring(../my:startDate, 6, 2))) div 12)) - 3) + 2) div 5) + (number(substring(../my:startDate, 1, 4)) + 4800 - (floor((14 - number(substring(../my:startDate, 6, 2))) div 12))) * 365 + floor((number(substring(../my:startDate, 1, 4)) + 4800 - (floor((14 - number(substring(../my:startDate, 6, 2))) div 12))) div 4) - floor((number(substring(../my:startDate, 1, 4)) + 4800 - (floor((14 - number(substring(../my:startDate, 6, 2))) div 12))) div 100) + floor((number(substring(../my:startDate, 1, 4)) + 4800 - (floor((14 - number(substring(../my:startDate, 6, 2))) div 12))) div 400) - 32045)
with the following Conditions on the Rule:
startDate is not blank and
endDate is not blank
Add a second Rule to the endDate field with the following settings:
Action: Set a field's value
Field: difference
Value: 0
with the following Conditions on the Rule:
startDate is blank or
endDate is blank
Add the following Rule to the difference field:
Action: Set a field's value
Field: .
Value: 0
with the following Condition on the Rule:
difference does not match pattern Custom Pattern: -{0,1}\d+
You should now have a fully functional InfoPath form that will calculate the difference between the dates soon after you have entered valid dates. This solution also works for InfoPath 2003 form templates and InfoPath 2007 browser-enabled form templates.
Use rules, conditions, and the number(), floor(), and substring() functions in formulas to calculate the difference between two date picker controls in InfoPath.
Problem
You have an InfoPath form template with two date picker controls and you would like to calculate the difference between the two date picker controls without writing code.
Solution
Use rules, conditions, and the number(), floor(), and substring() functions in formulas to calculate the difference between two date picker controls in InfoPath.
Discussion
You can accomplish this functionality as follows:
Design an InfoPath form template as shown in figure 1 with two Date Picker controls named startDate and endDate, and one Text Box control named difference.
Figure 1. InfoPath form template in Design mode.
The Main data source of the InfoPath form template should resemble the following figure:
Figure 2. The Main data source of the InfoPath form template.
Add the following Rule to the startDate field:
Action: Set a field's value
Field: difference
Value:
(number(substring(../my:endDate, 9, 2)) + floor((153 * (number(substring(../my:endDate, 6, 2)) + 12 * (floor((14 - number(substring(../my:endDate, 6, 2))) div 12)) - 3) + 2) div 5) + (number(substring(../my:endDate, 1, 4)) + 4800 - (floor((14 - number(substring(../my:endDate, 6, 2))) div 12))) * 365 + floor((number(substring(../my:endDate, 1, 4)) + 4800 - (floor((14 - number(substring(../my:endDate, 6, 2))) div 12))) div 4) - floor((number(substring(../my:endDate, 1, 4)) + 4800 - (floor((14 - number(substring(../my:endDate, 6, 2))) div 12))) div 100) + floor((number(substring(../my:endDate, 1, 4)) + 4800 - (floor((14 - number(substring(../my:endDate, 6, 2))) div 12))) div 400) - 32045) - (number(substring(., 9, 2)) + floor((153 * (number(substring(., 6, 2)) + 12 * (floor((14 - number(substring(., 6, 2))) div 12)) - 3) + 2) div 5) + (number(substring(., 1, 4)) + 4800 - (floor((14 - number(substring(., 6, 2))) div 12))) * 365 + floor((number(substring(., 1, 4)) + 4800 - (floor((14 - number(substring(., 6, 2))) div 12))) div 4) - floor((number(substring(., 1, 4)) + 4800 - (floor((14 - number(substring(., 6, 2))) div 12))) div 100) + floor((number(substring(., 1, 4)) + 4800 - (floor((14 - number(substring(., 6, 2))) div 12))) div 400) - 32045)
with the following Conditions on the Rule:
startDate is not blank and
endDate is not blank
Add a second Rule to the startDate field with the following settings:
Action: Set a field's value
Field: difference
Value: 0
with the following Conditions on the Rule:
startDate is blank or
endDate is blank
Add the following Rule to the endDate field:
Action: Set a field's value
Field: difference
Value:
(number(substring(., 9, 2)) + floor((153 * (number(substring(., 6, 2)) + 12 * (floor((14 - number(substring(., 6, 2))) div 12)) - 3) + 2) div 5) + (number(substring(., 1, 4)) + 4800 - (floor((14 - number(substring(., 6, 2))) div 12))) * 365 + floor((number(substring(., 1, 4)) + 4800 - (floor((14 - number(substring(., 6, 2))) div 12))) div 4) - floor((number(substring(., 1, 4)) + 4800 - (floor((14 - number(substring(., 6, 2))) div 12))) div 100) + floor((number(substring(., 1, 4)) + 4800 - (floor((14 - number(substring(., 6, 2))) div 12))) div 400) - 32045) - (number(substring(../my:startDate, 9, 2)) + floor((153 * (number(substring(../my:startDate, 6, 2)) + 12 * (floor((14 - number(substring(../my:startDate, 6, 2))) div 12)) - 3) + 2) div 5) + (number(substring(../my:startDate, 1, 4)) + 4800 - (floor((14 - number(substring(../my:startDate, 6, 2))) div 12))) * 365 + floor((number(substring(../my:startDate, 1, 4)) + 4800 - (floor((14 - number(substring(../my:startDate, 6, 2))) div 12))) div 4) - floor((number(substring(../my:startDate, 1, 4)) + 4800 - (floor((14 - number(substring(../my:startDate, 6, 2))) div 12))) div 100) + floor((number(substring(../my:startDate, 1, 4)) + 4800 - (floor((14 - number(substring(../my:startDate, 6, 2))) div 12))) div 400) - 32045)
with the following Conditions on the Rule:
startDate is not blank and
endDate is not blank
Add a second Rule to the endDate field with the following settings:
Action: Set a field's value
Field: difference
Value: 0
with the following Conditions on the Rule:
startDate is blank or
endDate is blank
Add the following Rule to the difference field:
Action: Set a field's value
Field: .
Value: 0
with the following Condition on the Rule:
difference does not match pattern Custom Pattern: -{0,1}\d+
You should now have a fully functional InfoPath form that will calculate the difference between the dates soon after you have entered valid dates. This solution also works for InfoPath 2003 form templates and InfoPath 2007 browser-enabled form templates.
Wednesday, March 17, 2010
Improving the Performance of InfoPath 2007 Forms
http://msdn.microsoft.com/en-us/library/bb380251.aspx
Improving the Performance of InfoPath 2007 Forms
Improving the Performance of InfoPath 2007 Forms
Friday, March 5, 2010
Custom Save Button for Web Enabled Form
REF: http://blogs.microlinkllc.com/dmcwee/archive/2009/04/30/custom-save-button-for-web-enabled-form.aspx David McWee's Blog
I recently found the need to submit and save Infopath 2007 browser enabled form data. The submit is very straight forward when using browser enabled forms, but the ability to save the form is not so straight forward or so you might think. After thinking for a little while on how to work around the save capability I found a very simple process to allow users to Submit and Save InfoPath Browser enabled forms back to the SharePoint Library without any custom code.
Designing the Form
Begin by creating an InfoPath 2007 form with a button and some text box control(s).
Add an additional Data Source called submitFormName
Add a Data Connection
Create the Data Source Connection that will allow the form to be submitted to the SharePoint site using the following steps.
Click on the Manage Data Connections… and then click the Add button
Select Create a new connection to: and Submit Data then click Next >
On the next screen Select a destination for submitting your data choose the To a document library on a SharePoint site then choose Next >
Now provide a URL to the document library you want to submit your data to. In the next to the file name textbox click on the fx button. Click on the Insert Field or Group… button and select the submitFormName field.
Click the OK button on the Select a Field or Group window and on the Insert Formula Window. On the data connection wizard check the Allow overwrite if file exists option. Click Next >
You can now provide a custom name for your data connection then click Next >.
Click Close on the Data Connections window
Add the actions to the Custom Button
Double Click on the button control added to the InfoPath form
Select Rules and Custom Code for the Action and provide a label and control ID, if desired, of your choice.
Click on the Rules… button and then click on the Add button in the Rules Window.
Name this rule Set File Name and click on the Set Condition… button. For the Condition check if the submitFormName is blank. Click the OK button.
Click the Add Action… button. For the action select Set a field's value, for the Field select submitFormName, for the Value use, using the fx builder use the expression concat("Account Request - ", now()) then click OK.
Click OK on the Rule Window. Now click on the Add… button again on the Rules window. Name this rule Submit Form and do not specify a condition. Add an action to Submit using a data connection and select the Data connection created in the last section.
Click the OK button on the Action and Rule windows.
Click the Add… button on the Rule Window. Name this rule Close Form and do not specify a condition. Add an action to close the form.
Click OK on all of the windows until you are back to the InfoPath form designer.
Now publish your form to the SharePoint site library that was specified in the Data Connection section. Once the form is published go to that library and choose Settings->Form Library Settings
Under the General Settings choose Advanced settings
In Advanced Settings under the Browser-enabled Documents choose Display as a Web page and then click OK
This will force the InfoPath form to be opened using Form Services.
Now complete a form and submit it. Then click on the form, change a value and submit again. You should see your changes applied after you submit.
I recently found the need to submit and save Infopath 2007 browser enabled form data. The submit is very straight forward when using browser enabled forms, but the ability to save the form is not so straight forward or so you might think. After thinking for a little while on how to work around the save capability I found a very simple process to allow users to Submit and Save InfoPath Browser enabled forms back to the SharePoint Library without any custom code.
Designing the Form
Begin by creating an InfoPath 2007 form with a button and some text box control(s).
Add an additional Data Source called submitFormName
Add a Data Connection
Create the Data Source Connection that will allow the form to be submitted to the SharePoint site using the following steps.
Click on the Manage Data Connections… and then click the Add button
Select Create a new connection to: and Submit Data then click Next >
On the next screen Select a destination for submitting your data choose the To a document library on a SharePoint site then choose Next >
Now provide a URL to the document library you want to submit your data to. In the next to the file name textbox click on the fx button. Click on the Insert Field or Group… button and select the submitFormName field.
Click the OK button on the Select a Field or Group window and on the Insert Formula Window. On the data connection wizard check the Allow overwrite if file exists option. Click Next >
You can now provide a custom name for your data connection then click Next >.
Click Close on the Data Connections window
Add the actions to the Custom Button
Double Click on the button control added to the InfoPath form
Select Rules and Custom Code for the Action and provide a label and control ID, if desired, of your choice.
Click on the Rules… button and then click on the Add button in the Rules Window.
Name this rule Set File Name and click on the Set Condition… button. For the Condition check if the submitFormName is blank. Click the OK button.
Click the Add Action… button. For the action select Set a field's value, for the Field select submitFormName, for the Value use, using the fx builder use the expression concat("Account Request - ", now()) then click OK.
Click OK on the Rule Window. Now click on the Add… button again on the Rules window. Name this rule Submit Form and do not specify a condition. Add an action to Submit using a data connection and select the Data connection created in the last section.
Click the OK button on the Action and Rule windows.
Click the Add… button on the Rule Window. Name this rule Close Form and do not specify a condition. Add an action to close the form.
Click OK on all of the windows until you are back to the InfoPath form designer.
Now publish your form to the SharePoint site library that was specified in the Data Connection section. Once the form is published go to that library and choose Settings->Form Library Settings
Under the General Settings choose Advanced settings
In Advanced Settings under the Browser-enabled Documents choose Display as a Web page and then click OK
This will force the InfoPath form to be opened using Form Services.
Now complete a form and submit it. Then click on the form, change a value and submit again. You should see your changes applied after you submit.
Using centrally managed SharePoint data connection files with InfoPath 2007
REF: aidangarnish.net November 3, 2008 11:06 by Aidan
When deploying InfoPath forms with data connections between environments it is possible to use centrally managed data connection files to make the process a bit smoother.
To set up a centrally managed data connection do the following:
From your InfoPath form select Data Connections... from the Data menu
Select the data connection you want to make centrally managed and click the Convert button
A .udcx file will be created in a site collection data connections library you select so it may be necessary to set up a data connections library first
Navigate to the site collection data connections library and save the .udcx file locally
Go to SharePoint Central Administration - Application Management - Manage Data Connection Files
Upload the .udcx file to the central data connection files library
Go back to the InfoPath form and remove the existing data connections.
Recreate the data connections using Search for connections on a Microsoft Office SharePoint Server
Create the connection using the .udcx file that was saved to the site collection data connection library but make sure that you click on Connection Options... and select Centrally Managed
Configure the controls on the form to use the data connection as normal
The form will now use the centrally managed data connection. To deploy to another environment (eg. UAT, Production) you will need to upload the .udcx file to the relevant SharePoint Central Administraion after altering it to use the connection properties relevant to the new environment. To update the .udcx file open it in a text editor and alter the following parameters (example is for a connection to a SharePoint list):
{175EC1CF-BF41-4848-B775-40277642B99F}
https://productionurl.co.uk/
Where ListId is the SharePoint list id and WebUrl is the url of the site collection that holds the SharePoint list.
When you deploy your InfoPath form it will reference the centrally managed .udcx file allowing it to seamlessly connect with data in the new environment.
When deploying InfoPath forms with data connections between environments it is possible to use centrally managed data connection files to make the process a bit smoother.
To set up a centrally managed data connection do the following:
From your InfoPath form select Data Connections... from the Data menu
Select the data connection you want to make centrally managed and click the Convert button
A .udcx file will be created in a site collection data connections library you select so it may be necessary to set up a data connections library first
Navigate to the site collection data connections library and save the .udcx file locally
Go to SharePoint Central Administration - Application Management - Manage Data Connection Files
Upload the .udcx file to the central data connection files library
Go back to the InfoPath form and remove the existing data connections.
Recreate the data connections using Search for connections on a Microsoft Office SharePoint Server
Create the connection using the .udcx file that was saved to the site collection data connection library but make sure that you click on Connection Options... and select Centrally Managed
Configure the controls on the form to use the data connection as normal
The form will now use the centrally managed data connection. To deploy to another environment (eg. UAT, Production) you will need to upload the .udcx file to the relevant SharePoint Central Administraion after altering it to use the connection properties relevant to the new environment. To update the .udcx file open it in a text editor and alter the following parameters (example is for a connection to a SharePoint list):
Where ListId is the SharePoint list id and WebUrl is the url of the site collection that holds the SharePoint list.
When you deploy your InfoPath form it will reference the centrally managed .udcx file allowing it to seamlessly connect with data in the new environment.
Creating a custom save function for InfoPath 2007 browser based forms
REF: aidangarnish.net December 8, 2008 14:41 by Aidan
I recently had an issue where it was necessary to only save some of the fields on an InfoPath form back to the form library. To do this required a combination of custom code and submission to a form library using a data connection.
The steps to do this were as follows:
1. Add a Save button to the form
2. Right click the save button and select button properties, change Action dropdown to Submit and click Submit Options...
3. In the submit options select Send form data to a single destination and choose SharePoint document library from the dropdown
4. Click Add to add a new data connection and follow the wizard to set this up to submit your form to the required library
5. Now that the data connection has been set up, select Perform custom action using Code and click the Edit Code button - this will create a submit method in the code behind file
6. In the submit method place the code to do the custom "stuff" and then submit the form to the data connection. The code will look something like:
public void FormEvents_Submit(object sender, SubmitEventArgs e)
{
//remove values from the form that you don't want to be saved
XPathNavigator xPnName = MainDataSource.CreateNavigator().SelectSingleNode("/my:myFields/my:Name", NamespaceManager);
xPnName.SetValue("");
//submit the form using the data connection
DataConnections["Main submit"].Execute();
//set e.CancalableArgs to be false once form has successfully saved
e.CancelableArgs.Cancel = false;
}
To give the form a unique filename and allow updates to saved forms do the following:
1. Create a new xml node called dtNow, give it a default value of now() and uncheck the Update this value when the result of the formula is recalculated box.
2. Go to Data and Data Connections and Modify the submit data connection created above.
3. In the Filename field add concat(userName(), dtNow) and check the Allow overwrite if the file exists checkbox.
Finally, convert the data connection used to submit the form to be centrally managed as described
Here
http://sladescross.wordpress.com/2009/10/07/infopath-custom-save/
http://blogs.3sharp.com/davidg/archive/2007/12/21/4504.aspx
I recently had an issue where it was necessary to only save some of the fields on an InfoPath form back to the form library. To do this required a combination of custom code and submission to a form library using a data connection.
The steps to do this were as follows:
1. Add a Save button to the form
2. Right click the save button and select button properties, change Action dropdown to Submit and click Submit Options...
3. In the submit options select Send form data to a single destination and choose SharePoint document library from the dropdown
4. Click Add to add a new data connection and follow the wizard to set this up to submit your form to the required library
5. Now that the data connection has been set up, select Perform custom action using Code and click the Edit Code button - this will create a submit method in the code behind file
6. In the submit method place the code to do the custom "stuff" and then submit the form to the data connection. The code will look something like:
public void FormEvents_Submit(object sender, SubmitEventArgs e)
{
//remove values from the form that you don't want to be saved
XPathNavigator xPnName = MainDataSource.CreateNavigator().SelectSingleNode("/my:myFields/my:Name", NamespaceManager);
xPnName.SetValue("");
//submit the form using the data connection
DataConnections["Main submit"].Execute();
//set e.CancalableArgs to be false once form has successfully saved
e.CancelableArgs.Cancel = false;
}
To give the form a unique filename and allow updates to saved forms do the following:
1. Create a new xml node called dtNow, give it a default value of now() and uncheck the Update this value when the result of the formula is recalculated box.
2. Go to Data and Data Connections and Modify the submit data connection created above.
3. In the Filename field add concat(userName(), dtNow) and check the Allow overwrite if the file exists checkbox.
Finally, convert the data connection used to submit the form to be centrally managed as described
Here
http://sladescross.wordpress.com/2009/10/07/infopath-custom-save/
http://blogs.3sharp.com/davidg/archive/2007/12/21/4504.aspx
Tuesday, February 23, 2010
Filtered cascading drop-downs in InfoPath browser forms using SharePoint lists and WSS owssvr.dll
REF: Biz Support Online .NET
by S.Y.M. Wong-A-Ton
Learn how you can use Windows SharePoint Services' (WSS) owssvr.dll and InfoPath's FileQueryConnection to write code that filters SharePoint list data displayed in dependent or cascading drop-down list boxes on an InfoPath browser form in SharePoint.
Problem
You have 3 drop-down list boxes on an InfoPath browser compatible form template.
You would like the second drop-down list box to be filled with only those items that are related to the item selected in the first drop-down list box, and you'd like the third drop-down list box to be filled with only those items that are related to the item selected in the second drop-down list box.
In essence, you want to create cascading drop-down list boxes on an InfoPath browser form.
Solution
Use the owssvr.dll of Windows SharePoint Services (WSS) to filter SharePoint list data and populate drop-down list boxes on an InfoPath browser form, thereby creating cascading lists.
Discussion
There are several ways to create cascading drop-down list boxes in InfoPath, some of which include using the Filter Data option in InfoPath if you're not creating a browser-compatible form template, using a web service, or writing code to filter items and then programmatically populate drop-down list boxes.
REF: Biz Support Online .NET
by S.Y.M. Wong-A-Ton
by S.Y.M. Wong-A-Ton
Learn how you can use Windows SharePoint Services' (WSS) owssvr.dll and InfoPath's FileQueryConnection to write code that filters SharePoint list data displayed in dependent or cascading drop-down list boxes on an InfoPath browser form in SharePoint.
Problem
You have 3 drop-down list boxes on an InfoPath browser compatible form template.
You would like the second drop-down list box to be filled with only those items that are related to the item selected in the first drop-down list box, and you'd like the third drop-down list box to be filled with only those items that are related to the item selected in the second drop-down list box.
In essence, you want to create cascading drop-down list boxes on an InfoPath browser form.
Solution
Use the owssvr.dll of Windows SharePoint Services (WSS) to filter SharePoint list data and populate drop-down list boxes on an InfoPath browser form, thereby creating cascading lists.
Discussion
There are several ways to create cascading drop-down list boxes in InfoPath, some of which include using the Filter Data option in InfoPath if you're not creating a browser-compatible form template, using a web service, or writing code to filter items and then programmatically populate drop-down list boxes.
REF: Biz Support Online .NET
by S.Y.M. Wong-A-Ton
Tuesday, February 9, 2010
Better Preview in Infopath 2007
You need to specify the correct preview domain in Form options if you want the wanring box to go away every time you preview.
This is done by opening Tools > Form Options > Preview
Enter your domain in the Domain text box.
This is done by opening Tools > Form Options > Preview
Enter your domain in the Domain text box.
Cascading Dropdowns in Browser Forms
REF: http://blogs.msdn.com/infopath/archive/2006/10/12/cascading-dropdowns-in-browser-forms.aspx
If you are building an InfoPath client-only solution and you need to filter drop-down list boxes, you can simply use the “Filter Data” feature when you set the Entries property for the control. However, since filters are not supported in browser-compatible form templates, how can you accomplish the same functionality?
This is where .NET web services can “save the day!” By creating web methods that accept parameters, you can add those web methods as data connections and then pass the selected value from one drop-down list box to the appropriate data connection “queryField”. Once the queryField has been set, simply execute that data connection to retrieve the associated values.
To setup this sample, you will need to have access to the SQL Server Northwind sample database and Visual Studio installed on your server.
First, let’s create the web service and the two web methods we will use in this sample:
Step 1: Open the appropriate web site
Launch Visual Studio
From the File menu, select Open and choose Web Site
Select File System and then navigate to: C:\Program Files\Common Files\Microsoft Shared\web server extensions\12\TEMPLATE\LAYOUTS
NOTE: By choosing to open the LAYOUTS folder, your web service will be available from all provisioned sites. If you want the web service only to be available from a specific site (i.e. the default site) you would want to open: C:\Inetpub\wwwroot\wss\VirtualDirectories\80
Click Open
In the Solution Explorer, right-click on the web site and choose New Folder
Rename this folder to: WebServices
Because you may have multiple web services, let’s add a sub folder here that is specific to our web service:
Right-click on WebServices and choose New Folder
Rename this folder to: NorthwindTables
Step 2: Create the web service
Right-click on NorthwindTables and choose Add New Item
From the Visual Studio installed templates list choose Web Service
In the Name box, rename this to: NorthwindTable.asmx
Uncheck the option “Place code in a separate file” and click Add
Step 3: Add the web methods
NOTE: For this sample, it is assumed the SQL Server database is installed on the same Microsoft Office SharePoint Server.
Add the following “using” declarations at the top of your code page:
using System.Data;
using System.Data.SqlClient;
Add the following web method to retrieve the CustomerID values from the Customers table in the Northwind database:
[WebMethod]
public DataSet GetCustomers() {
// Create a SQL connection to the Northwind sample database
SqlConnection cn = new SqlConnection("Data Source=(local);Integrated Security=SSPI;Initial Catalog=Northwind");
// Create data adapter object passing it the SELECT
// statement to retrieve the customer ID values
SqlDataAdapter da = new SqlDataAdapter("SELECT Customers.CustomerID FROM Customers Order By CustomerID", cn);
// Create a dataset object to store the data
DataSet ds = new DataSet();
// Open the connection
cn.Open();
// Fill the dataset
da.Fill(ds, "Customers");
// Clean up
cn.Close();
cn = null;
da = null;
return ds;
}
Add the following web method to retrieve the associated orders for the selected customer:
[WebMethod]
public DataSet GetOrdersForSelectedCustomer(string strCustID) {
// Create a SQL connection to the Northwind sample database
SqlConnection cn = new SqlConnection("Data Source=(local);Integrated Security=SSPI;Initial Catalog=Northwind");
// Create a string variable for the modified SQL statement
string strOrdersSQL = "";
// Create a string variable for the default SQL statement
string strOrdersOrigSQL = "SELECT * FROM Orders";
// Some of the customer ID values contain apostrophe's - we need
// to replace them with two single quotation marks so that all
// single quotation marks in the CustomerID are parsed correctly.
strCustID = strCustID.Replace("'", "''");
// Concatenate the default SQL statement with the "Where" clause
// and add an OrderBy clause
strOrdersSQL = strOrdersOrigSQL + " Where CustomerID Like '%" + strCustID + "%' Order By OrderID";
// Create data adapter object passing it the SELECT statement
// to retrieve the OrderID values
SqlDataAdapter daOrders = new SqlDataAdapter(strOrdersSQL, cn);
// Create a dataset object to store the data
DataSet Ds = new DataSet();
// Open the connection
cn.Open();
// Fill the DataSet
daOrders.Fill(Ds, "Orders");
// Clean up
cn.Close();
cn = null;
daOrders = null;
return Ds;
}
Build and save the project
Step 4: Test the web methods
NOTE: The Identity account of the Application Pool for the web site where this web service is published will need to have access to the SQL Server database.
Open a browser and navigate to: http:///_layouts/WebServices/NorthwindTables/NorthwindTables.asmx (replace with the name of your server)
You should see the two web methods created above along with the default HelloWorld web method:
Click the GetCustomers link and then click Invoke – this should return a list of the CustomerID values
Click the GetOrdersForSelectedCustomer link, in the strCustID box enter: BERGS and then click Invoke – this should return a list of only those OrderID values for BERGS
Step 5: Create the InfoPath form
Design a new, blank, browser-compatible InfoPath Form Template
Add a drop-down list box to the view and modify the name to: SelectCustomer
Add another drop-down list box to the view and modify the name to: SelectOrder
Add a new “receive data” data connection to the NorthwindTables web service for each of the web methods created above as follows:
GetCustomers:
Enable the option “Automatically retrieve data when the form is opened”
GetOrdersForSelectedCustomer:
Use ALFKI as the sample value for the strCustID parameter when prompted in the Data Connection Wizard
Uncheck the option “Automatically retrieve data when the form is opened”
Set the Data source for SelectCustomer to the GetCustomers data connection and use the CustomerID field for both the Value and Display name properties
Set the Data source for SelectOrder to the GetOrdersForSelectedCustomer data connection and use the OrderID field for both the Value and Display name properties
Create a Rule on SelectCustomer with the following actions:
Set a field’s value: Set the SelectOrder field to nothing (e.g. leave the Value blank)
Set a field’s value: Set the parameter value (strCustID) for the GetOrdersForSelectedCustomer data connection to the SelectCustomer field
Query the GetOrdersForSelectedCustomer data connection
Save the form locally as FilteredDrop-downs_IPFS.XSN
Step 6: Publish the form
Publish the form to a server running InfoPath Form Services
Navigate to the form library where the form was published and click the New button
From SelectCustomer choose BERGS
Click SelectOrder – only those orders for BERGS are displayed
Select a different customer – notice the orders have also changed
Scott Heim
Support Engineer
Posted: Thursday, October 12, 2006 11:24 AM by infopath
http://blogs.msdn.com/infopath/archive/2006/10/12/cascading-dropdowns-in-browser-forms.aspx
If you are building an InfoPath client-only solution and you need to filter drop-down list boxes, you can simply use the “Filter Data” feature when you set the Entries property for the control. However, since filters are not supported in browser-compatible form templates, how can you accomplish the same functionality?
This is where .NET web services can “save the day!” By creating web methods that accept parameters, you can add those web methods as data connections and then pass the selected value from one drop-down list box to the appropriate data connection “queryField”. Once the queryField has been set, simply execute that data connection to retrieve the associated values.
To setup this sample, you will need to have access to the SQL Server Northwind sample database and Visual Studio installed on your server.
First, let’s create the web service and the two web methods we will use in this sample:
Step 1: Open the appropriate web site
Launch Visual Studio
From the File menu, select Open and choose Web Site
Select File System and then navigate to: C:\Program Files\Common Files\Microsoft Shared\web server extensions\12\TEMPLATE\LAYOUTS
NOTE: By choosing to open the LAYOUTS folder, your web service will be available from all provisioned sites. If you want the web service only to be available from a specific site (i.e. the default site) you would want to open: C:\Inetpub\wwwroot\wss\VirtualDirectories\80
Click Open
In the Solution Explorer, right-click on the web site and choose New Folder
Rename this folder to: WebServices
Because you may have multiple web services, let’s add a sub folder here that is specific to our web service:
Right-click on WebServices and choose New Folder
Rename this folder to: NorthwindTables
Step 2: Create the web service
Right-click on NorthwindTables and choose Add New Item
From the Visual Studio installed templates list choose Web Service
In the Name box, rename this to: NorthwindTable.asmx
Uncheck the option “Place code in a separate file” and click Add
Step 3: Add the web methods
NOTE: For this sample, it is assumed the SQL Server database is installed on the same Microsoft Office SharePoint Server.
Add the following “using” declarations at the top of your code page:
using System.Data;
using System.Data.SqlClient;
Add the following web method to retrieve the CustomerID values from the Customers table in the Northwind database:
[WebMethod]
public DataSet GetCustomers() {
// Create a SQL connection to the Northwind sample database
SqlConnection cn = new SqlConnection("Data Source=(local);Integrated Security=SSPI;Initial Catalog=Northwind");
// Create data adapter object passing it the SELECT
// statement to retrieve the customer ID values
SqlDataAdapter da = new SqlDataAdapter("SELECT Customers.CustomerID FROM Customers Order By CustomerID", cn);
// Create a dataset object to store the data
DataSet ds = new DataSet();
// Open the connection
cn.Open();
// Fill the dataset
da.Fill(ds, "Customers");
// Clean up
cn.Close();
cn = null;
da = null;
return ds;
}
Add the following web method to retrieve the associated orders for the selected customer:
[WebMethod]
public DataSet GetOrdersForSelectedCustomer(string strCustID) {
// Create a SQL connection to the Northwind sample database
SqlConnection cn = new SqlConnection("Data Source=(local);Integrated Security=SSPI;Initial Catalog=Northwind");
// Create a string variable for the modified SQL statement
string strOrdersSQL = "";
// Create a string variable for the default SQL statement
string strOrdersOrigSQL = "SELECT * FROM Orders";
// Some of the customer ID values contain apostrophe's - we need
// to replace them with two single quotation marks so that all
// single quotation marks in the CustomerID are parsed correctly.
strCustID = strCustID.Replace("'", "''");
// Concatenate the default SQL statement with the "Where" clause
// and add an OrderBy clause
strOrdersSQL = strOrdersOrigSQL + " Where CustomerID Like '%" + strCustID + "%' Order By OrderID";
// Create data adapter object passing it the SELECT statement
// to retrieve the OrderID values
SqlDataAdapter daOrders = new SqlDataAdapter(strOrdersSQL, cn);
// Create a dataset object to store the data
DataSet Ds = new DataSet();
// Open the connection
cn.Open();
// Fill the DataSet
daOrders.Fill(Ds, "Orders");
// Clean up
cn.Close();
cn = null;
daOrders = null;
return Ds;
}
Build and save the project
Step 4: Test the web methods
NOTE: The Identity account of the Application Pool for the web site where this web service is published will need to have access to the SQL Server database.
Open a browser and navigate to: http://
You should see the two web methods created above along with the default HelloWorld web method:
Click the GetCustomers link and then click Invoke – this should return a list of the CustomerID values
Click the GetOrdersForSelectedCustomer link, in the strCustID box enter: BERGS and then click Invoke – this should return a list of only those OrderID values for BERGS
Step 5: Create the InfoPath form
Design a new, blank, browser-compatible InfoPath Form Template
Add a drop-down list box to the view and modify the name to: SelectCustomer
Add another drop-down list box to the view and modify the name to: SelectOrder
Add a new “receive data” data connection to the NorthwindTables web service for each of the web methods created above as follows:
GetCustomers:
Enable the option “Automatically retrieve data when the form is opened”
GetOrdersForSelectedCustomer:
Use ALFKI as the sample value for the strCustID parameter when prompted in the Data Connection Wizard
Uncheck the option “Automatically retrieve data when the form is opened”
Set the Data source for SelectCustomer to the GetCustomers data connection and use the CustomerID field for both the Value and Display name properties
Set the Data source for SelectOrder to the GetOrdersForSelectedCustomer data connection and use the OrderID field for both the Value and Display name properties
Create a Rule on SelectCustomer with the following actions:
Set a field’s value: Set the SelectOrder field to nothing (e.g. leave the Value blank)
Set a field’s value: Set the parameter value (strCustID) for the GetOrdersForSelectedCustomer data connection to the SelectCustomer field
Query the GetOrdersForSelectedCustomer data connection
Save the form locally as FilteredDrop-downs_IPFS.XSN
Step 6: Publish the form
Publish the form to a server running InfoPath Form Services
Navigate to the form library where the form was published and click the New button
From SelectCustomer choose BERGS
Click SelectOrder – only those orders for BERGS are displayed
Select a different customer – notice the orders have also changed
Scott Heim
Support Engineer
Posted: Thursday, October 12, 2006 11:24 AM by infopath
http://blogs.msdn.com/infopath/archive/2006/10/12/cascading-dropdowns-in-browser-forms.aspx
InfoPath form Services - implementing a Master-Detail on the web
REF:http://www.sharepoint-tips.com/2007/01/infopath-form-services-implementing.html
If you ever tried publishing a form to the web using infopath form services, you probably know that one compatibility issue you will have is with master-detail (also known as "cascading dropdowns") fields.
Master-detail basically means when you have two fields (usualy dropdown boxes) and you want the options in the second field to change based on the choice the user made in the first field.
For example, I have a dropdown called "States", and a dropdown calles "Cities". Now I want when the user chooses a state, to only show cities within the chosen state.
This is easy to do in infopath - just connect the dropdowns with a little configuration. But when you try to publish the form to a web form, it will tell you that the master-detail will simply not work in the web form. It's not supported.
To the rescue!
http://www.sharepoint-tips.com/2007/01/infopath-form-services-implementing.html
NOTE: This works but you need to have your security setting to Fully Trusted!!!!
If you ever tried publishing a form to the web using infopath form services, you probably know that one compatibility issue you will have is with master-detail (also known as "cascading dropdowns") fields.
Master-detail basically means when you have two fields (usualy dropdown boxes) and you want the options in the second field to change based on the choice the user made in the first field.
For example, I have a dropdown called "States", and a dropdown calles "Cities". Now I want when the user chooses a state, to only show cities within the chosen state.
This is easy to do in infopath - just connect the dropdowns with a little configuration. But when you try to publish the form to a web form, it will tell you that the master-detail will simply not work in the web form. It's not supported.
To the rescue!
http://www.sharepoint-tips.com/2007/01/infopath-form-services-implementing.html
NOTE: This works but you need to have your security setting to Fully Trusted!!!!
Thursday, January 21, 2010
How to attach multiple attachments on a browser based form
REF: http://www.infopathdev.com/forums/p/13502/47860.aspx
File attachement controls ARE allowed in browser forms. If your data structure is correct, there is no reason the previously attached attachment would repeat.
Simply drag a repeating section onto the form, then drag a file attachment control into that repeating section. InfoPath will generate a data source with the base64 field INSIDE the repeating group. If you want to create the data source yourself, first, create a repeating group and then, inside it, add the base64 field.
Mind you, if you already have a form in use with the field as a non repeating field and not in a repeating group, moving it will probably cause data loss in existing forms.
File attachement controls ARE allowed in browser forms. If your data structure is correct, there is no reason the previously attached attachment would repeat.
Simply drag a repeating section onto the form, then drag a file attachment control into that repeating section. InfoPath will generate a data source with the base64 field INSIDE the repeating group. If you want to create the data source yourself, first, create a repeating group and then, inside it, add the base64 field.
Mind you, if you already have a form in use with the field as a non repeating field and not in a repeating group, moving it will probably cause data loss in existing forms.
Wednesday, January 20, 2010
How to Redirect to an Sharepoint Home Page after cliking on the submit button
How to Redirect to an Sharepoint Home Page after cliking on the submit button in the infopath form placed in an XmlFormView Webpart
REF: http://www.infopathdev.com/forums/t/14149.aspx
HttpContext.Current.Response.Redirect("http://yoursite.com/somepage.aspx", true);
If not try the following
I have a webpart that links to infopath forms and I do the following for the hyperlink
(Sitehostingthexml + "/_layouts/FormServer.aspx?XmlLocation=/yourlibrary/yuorxml.xml" + "&Source=/_layouts/windowclose.htm&DefaultItemOpen=1&OpenIn=Browser");
Windowclose.htm should reside in "C:\Program Files\Common Files\Microsoft Shared\web server extensions\12\TEMPLATE\LAYOUTS"
the code for windowclose.htm is below. What I do is close the form you could do a redirect via javascript.
REF: http://www.infopathdev.com/forums/t/14149.aspx
HttpContext.Current.Response.Redirect("http://yoursite.com/somepage.aspx", true);
If not try the following
I have a webpart that links to infopath forms and I do the following for the hyperlink
(Sitehostingthexml + "/_layouts/FormServer.aspx?XmlLocation=/yourlibrary/yuorxml.xml" + "&Source=/_layouts/windowclose.htm&DefaultItemOpen=1&OpenIn=Browser");
Windowclose.htm should reside in "C:\Program Files\Common Files\Microsoft Shared\web server extensions\12\TEMPLATE\LAYOUTS"
the code for windowclose.htm is below. What I do is close the form you could do a redirect via javascript.
Please Close the following screen.
Thank You
Tuesday, January 19, 2010
Cascading Drop downs in InfoPath Web Forms made easy
Posted by Frederik Van Lierde
REF: http://blueinfopath.blogspot.com/search?updated-max=2008-12-08T09%3A54%3A00-08%3A00&max-results=7
To create user‐friendly web forms, cascading drop down list boxes is a must, but InfoPath Form Services doesn’t allow you to use them, like you can use them with InfoPath Client. (Filter Data on DataConnections/DataSources are not allowed with InfoPath Web Forms)
This article explains how to use Cascading Drop down list boxes within an InfoPath Web Form in a very easy and re-usable way.
Please download the PDF file containing the step by step guide HOW_TO_use_Cascading_Dropdown_ListBoxes_within_an_InfoPath_Web_Form.pdf
REF: http://blueinfopath.blogspot.com/search?updated-max=2008-12-08T09%3A54%3A00-08%3A00&max-results=7
To create user‐friendly web forms, cascading drop down list boxes is a must, but InfoPath Form Services doesn’t allow you to use them, like you can use them with InfoPath Client. (Filter Data on DataConnections/DataSources are not allowed with InfoPath Web Forms)
This article explains how to use Cascading Drop down list boxes within an InfoPath Web Form in a very easy and re-usable way.
Please download the PDF file containing the step by step guide HOW_TO_use_Cascading_Dropdown_ListBoxes_within_an_InfoPath_Web_Form.pdf
Auto-Generating Filenames for InfoPath Forms
Posted by Clayton Cobb on June 20, 2009
REF: http://claytoncobb.wordpress.com/2009/06/20/auto-generating-filenames-for-infopath-forms/
Auto-Generating Filenames for InfoPath Forms – I see this topic come up a LOT on forums all over the place, so instead of continuing to answer the question time and time again, I am going to post a quick blog entry showing the steps. I think this stuff is fairly simple, but it just doesn’t pop into your head initially. Once you see it and understand it, you’ll think it’s simple, too. Keep in mind that I focus entirely on SharePoint-based InfoPath forms and for the most part BROWSER-ENABLED forms. So, it’s possible and likely that all concepts explained here will work for non-browser forms and non-SharePoint forms, but just remember that my perspective is mostly browser-enabled. The basis for this topic is that the standard method for submitting InfoPath browser-enabled forms is for the user to click Save at which point the user is prompted to give a filename along with choosing to allow overwrite. I really dislike this feature, because users have no concept of proper naming convention for the most part, and there’s no way to guarantee they create a unique or meaningful filename. I also just don’t like the user getting prompted. I prefer for the user to just click a button that saves the file to SharePoint with a dynamically-defined filename, closes the form, and takes the user back to the forms library. Ok, so how do we do ensure these few things:
The filename must be unique
The filename must persist through subsequent edits of the form without the user having to do anything
The built-in toolbar buttons must be hidden
A custom button must be created to do it all
Here are the steps:
Create the field for storing the filename
Create the Submit data connection that uses this field
Disable the browser-based toolbar functions
Create the custom submit button
Create a hidden field for storing filename
Create a strFilename field (Text). Do not set any conditional formatting, rules, or data validation on this. Add it to the canvas for now and make it read-only (Fig 1). This will be visible for testing purposes only.
Fig 1 – Create hidden field named strFilename
Create a Submit data connection that uses the strFilename field for dynamically creating the filename
Create a SUBMIT data connection in your form template that connects to the Form Library where the form resides. Put in the URL of your Form Library for the “Document Library” field, and choose the strFilename data element for “File name” field by using the fx button. Check the box for “Allow overwrite if file exists” (Fig 2).
Fig 2 – Creating the Submit data connection for the Form Library
Disable toolbar options
Click Tools > Form Options > Browser. Uncheck Save, and Save As (Fig 3). Submit should be grayed since it has not been configured. If it has been configured, be sure it is unchecked. Update should be unchecked by default, so leave it. I personally uncheck “Views,” since I use views to dynamically route people to certain information based off their identity or the form’s workflow status, but it’s up to you. If your form is not browser-enabled, use the Open and Save menu in Form Options to uncheck Save and Save As.
Fig 3 – Disabling toolbar functions for Browser-Enabled Forms
Create the custom Submit button
Drag a button control to your canvas and double-click it to get to its properties. Change the display name to “Submit” or whatever you prefer, then click Rules. You want to add two rules, each with one condition (Fig 4).
Fig 4 – Custom Submit button with two rules
The first rule allows you to Edit the existing form without changing strFilename, then close it (Fig 5).
Set a condition rule to have one condition stating that strFilename is not blank.
Add two actions in this order:
Submit to your SharePoint Library Submit data connection
Close
Fig 5 – Editing the form with the submit data connection
Here, we are simply submitting the form back to the library in a manner that will not change any metadata and will overwrite the existing file of the same name. This is the whole reason for the strFilename field. We do not want the strFilename to be recreated each time the form is edited. This rule is placed before the Submit rule for the same reason as stated above. We need to check first to see if the form has already been submitted. If so, then we submit using the current strFilename. If not, then we skip this rule.
The second rules will Submit the current form only if it is brand new and after dynamically creating the strFilename, then it closes the form.
Set a condition rule to have one condition stating that strFilename is blank.
Add three actions in this order:
Set the Value of strFilename (Fig 6) to the concatenated string combining userName() with now(). The formula is concat(userName(), now()). The Xpath is concat(xdUser:get-UserName(), xdDate:Now()). Note: I add a text hyphen in the middle to make it a little easier to read, but that’s up to your discretion.
Submit to your SharePoint Library Submit data connection
Close
Fig 6 – Setting the dynamic filename prior to submission
Here, we are submitting the form to the form library for the first time. This is why we first dynamically create the strFilename, because the Submit data connection uses this field to create the filename in SharePoint. We only want to do this step upon first submission, so that is why this rule only runs if the strFilename is blank. Doing this rule last keeps us from double-submitting, because the Edit rule would run right after the Submit rule due to its condition being met (strFilename is not blank). You can of course choose any concatenation formula you want as long as it is unique. This particular formula can only create a non-unique filename if the same user submits two separates forms (two browser forms open simultaneously) at the same EXACT second.
Publish your form to a new form library, and set that library to Display in Browser (Advanced Settings). Click New to create a new form (Fig 7)
Fig 7 – A new form before submission
Click submit, and it should take you back to the library with no prompts or delays. You will see a new form with a unique filename (Fig 8). The now() function gives the date AND time separate by the letter “T.”
Fig 8 – Newly-created form has unique filename
Click on that new form and notice that the strFilename field has been populated with the same info you saw for the filename in the library (Fig 9). This field is actually populated FIRST when you submit, because it forms the basis for the filename in the Submit data connection. Click submit again and notice that the existing file has been changed rather than a new file being created.
Fig 9 – strFilename field is populated with the dynamic, unique filename
Reference links for related articles:
InfoPath Submit Error- A value
REF: http://claytoncobb.wordpress.com/2009/06/20/auto-generating-filenames-for-infopath-forms/
Auto-Generating Filenames for InfoPath Forms – I see this topic come up a LOT on forums all over the place, so instead of continuing to answer the question time and time again, I am going to post a quick blog entry showing the steps. I think this stuff is fairly simple, but it just doesn’t pop into your head initially. Once you see it and understand it, you’ll think it’s simple, too. Keep in mind that I focus entirely on SharePoint-based InfoPath forms and for the most part BROWSER-ENABLED forms. So, it’s possible and likely that all concepts explained here will work for non-browser forms and non-SharePoint forms, but just remember that my perspective is mostly browser-enabled. The basis for this topic is that the standard method for submitting InfoPath browser-enabled forms is for the user to click Save at which point the user is prompted to give a filename along with choosing to allow overwrite. I really dislike this feature, because users have no concept of proper naming convention for the most part, and there’s no way to guarantee they create a unique or meaningful filename. I also just don’t like the user getting prompted. I prefer for the user to just click a button that saves the file to SharePoint with a dynamically-defined filename, closes the form, and takes the user back to the forms library. Ok, so how do we do ensure these few things:
The filename must be unique
The filename must persist through subsequent edits of the form without the user having to do anything
The built-in toolbar buttons must be hidden
A custom button must be created to do it all
Here are the steps:
Create the field for storing the filename
Create the Submit data connection that uses this field
Disable the browser-based toolbar functions
Create the custom submit button
Create a hidden field for storing filename
Create a strFilename field (Text). Do not set any conditional formatting, rules, or data validation on this. Add it to the canvas for now and make it read-only (Fig 1). This will be visible for testing purposes only.
Fig 1 – Create hidden field named strFilename
Create a Submit data connection that uses the strFilename field for dynamically creating the filename
Create a SUBMIT data connection in your form template that connects to the Form Library where the form resides. Put in the URL of your Form Library for the “Document Library” field, and choose the strFilename data element for “File name” field by using the fx button. Check the box for “Allow overwrite if file exists” (Fig 2).
Fig 2 – Creating the Submit data connection for the Form Library
Disable toolbar options
Click Tools > Form Options > Browser. Uncheck Save, and Save As (Fig 3). Submit should be grayed since it has not been configured. If it has been configured, be sure it is unchecked. Update should be unchecked by default, so leave it. I personally uncheck “Views,” since I use views to dynamically route people to certain information based off their identity or the form’s workflow status, but it’s up to you. If your form is not browser-enabled, use the Open and Save menu in Form Options to uncheck Save and Save As.
Fig 3 – Disabling toolbar functions for Browser-Enabled Forms
Create the custom Submit button
Drag a button control to your canvas and double-click it to get to its properties. Change the display name to “Submit” or whatever you prefer, then click Rules. You want to add two rules, each with one condition (Fig 4).
Fig 4 – Custom Submit button with two rules
The first rule allows you to Edit the existing form without changing strFilename, then close it (Fig 5).
Set a condition rule to have one condition stating that strFilename is not blank.
Add two actions in this order:
Submit to your SharePoint Library Submit data connection
Close
Fig 5 – Editing the form with the submit data connection
Here, we are simply submitting the form back to the library in a manner that will not change any metadata and will overwrite the existing file of the same name. This is the whole reason for the strFilename field. We do not want the strFilename to be recreated each time the form is edited. This rule is placed before the Submit rule for the same reason as stated above. We need to check first to see if the form has already been submitted. If so, then we submit using the current strFilename. If not, then we skip this rule.
The second rules will Submit the current form only if it is brand new and after dynamically creating the strFilename, then it closes the form.
Set a condition rule to have one condition stating that strFilename is blank.
Add three actions in this order:
Set the Value of strFilename (Fig 6) to the concatenated string combining userName() with now(). The formula is concat(userName(), now()). The Xpath is concat(xdUser:get-UserName(), xdDate:Now()). Note: I add a text hyphen in the middle to make it a little easier to read, but that’s up to your discretion.
Submit to your SharePoint Library Submit data connection
Close
Fig 6 – Setting the dynamic filename prior to submission
Here, we are submitting the form to the form library for the first time. This is why we first dynamically create the strFilename, because the Submit data connection uses this field to create the filename in SharePoint. We only want to do this step upon first submission, so that is why this rule only runs if the strFilename is blank. Doing this rule last keeps us from double-submitting, because the Edit rule would run right after the Submit rule due to its condition being met (strFilename is not blank). You can of course choose any concatenation formula you want as long as it is unique. This particular formula can only create a non-unique filename if the same user submits two separates forms (two browser forms open simultaneously) at the same EXACT second.
Publish your form to a new form library, and set that library to Display in Browser (Advanced Settings). Click New to create a new form (Fig 7)
Fig 7 – A new form before submission
Click submit, and it should take you back to the library with no prompts or delays. You will see a new form with a unique filename (Fig 8). The now() function gives the date AND time separate by the letter “T.”
Fig 8 – Newly-created form has unique filename
Click on that new form and notice that the strFilename field has been populated with the same info you saw for the filename in the library (Fig 9). This field is actually populated FIRST when you submit, because it forms the basis for the filename in the Submit data connection. Click submit again and notice that the existing file has been changed rather than a new file being created.
Fig 9 – strFilename field is populated with the dynamic, unique filename
Reference links for related articles:
InfoPath Submit Error- A value
Monday, January 18, 2010
InfoPath - GetUserProfileByName - Get user information on another person
You can obtain the functionality by using the webservice called: userprofileservice.asmx. Take a look at this guide:
http://blogs.microsoft.co.il/blogs/itaysk/archive/2007/04/05/InfoPath-_2D00_-Get-the-current-user-without-writing-code.aspx?
This guide does not have an example of how to get user information on another person. You can do this by:
http://blogs.microsoft.co.il/blogs/itaysk/archive/2007/04/05/InfoPath-_2D00_-Get-the-current-user-without-writing-code.aspx?
This guide does not have an example of how to get user information on another person. You can do this by:
- Adding a field
- Adding a button
- Actions for the button:
- Set field value: GetUserProfileByName:myfields:QueryFields:AccountName = The field you added in step 1
- Recieve data with GetUserProfileByName
- Now you have populated the GetUserProfileByName with all the data on the new user from the SharePoint user profile database.
- Perform step 1 to 11 followng the guide in the link above to fill out fields of your choice
Tip of the day: The above mentioned method will leave you with a very rigid input field to get info on a new user. To solve this problem you can use the contact selector. Google: "InfoPath Contact Selector".
Done :-)
If this is making no sense at all let me know.
Best regards
REF: http://www.infopathdev.com/forums/p/7844/29319.aspx#29319
Using InfoPath 2007 Translate function to do what XPath lower-case function does
REF: http://blog.michaellotter.com/post/0a09090909-Using-InfoPath-2007-Translate-function-to-do-what-XPath-lower-case-function-does0a-0a090909.aspx

If you foresee yourself using this more often then something to consider is creating a “Template Part” for this. It would be very simple because it would have two fields one called “translate_uppercase” and another “translate_lowercase” and each field default value would be the alphabet in the correct case. Then whenever you would want to use the “Translate” function you would add the “Translate Lower Case Template Part” to the form and build the expression as translate(fieldname, translate_uppercase, translate_lowercase). This would be a lot simpler than typing in all those letters and if you have more than one person doing InfoPath development it would create a standard way of doing it.
Several days ago Joe and I found ourselves wanting to make sure we made the InfoPath “UserName()” function return all lower case characters and we decided to use the common XPath function “lower-case” but was surprised because it didn’t work. With a little research I found that we could use the InfoPath “Translate” function instead. I must say that it’s a little frustrating that some common XPath functions don’t work and you have to find the work around but if you do any InfoPath development you come accustom to it. Below is what we tried that didn’t work and what we did that did work.
What didn’t work:
lower-case(xdUser:get-UserName())
lower-case(xdUser:get-UserName())
What did work:
translate(InsertFieldHere, "ABCDEFGHIJKLMNOPQRSTUVWYXZ", "abcdefghijklmnopqrstuvwyxz")
translate(InsertFieldHere, "ABCDEFGHIJKLMNOPQRSTUVWYXZ", "abcdefghijklmnopqrstuvwyxz")


Basically for “Translate” we had to specify every letter in the alphabet in UPPERCASE and then lowercase to make sure every character will get translated. For more information on “Translate” checkout this link http://office.microsoft.com/en-us/infopath/HA012330391033.aspx and do a search for “Translate” for the official description (It’s towards the bottom of the page).
If you foresee yourself using this more often then something to consider is creating a “Template Part” for this. It would be very simple because it would have two fields one called “translate_uppercase” and another “translate_lowercase” and each field default value would be the alphabet in the correct case. Then whenever you would want to use the “Translate” function you would add the “Translate Lower Case Template Part” to the form and build the expression as translate(fieldname, translate_uppercase, translate_lowercase). This would be a lot simpler than typing in all those letters and if you have more than one person doing InfoPath development it would create a standard way of doing it.
Syntax
translate(argument1, argument2, argument3)
translate(argument1, argument2, argument3)
- argument1 The name of the field that contains the text whose characters will be replaced. Separate arguments with a comma.
- argument2 A character or the value of a field with a text data type that will be replaced by the characters in the third argument. Separate arguments with a comma.
- argument3 A character or the value of a field with a text data type that will replace every instance of the character in the second argument
Note: This should be used with caution though because it has a significant impact on performance. The translate function is SOOOO much more demanding than the lower-case function.
Thursday, January 14, 2010
Forcing InfoPath form links to load in web browser
by: dougthebuilde (formerly bobthebuilder)
REF: http://suguk.org/blogs/sharepointhack/archive/2007/05/06/3281.aspx
Scenario and solution:
You have a page that containd web part views into your forms library (that contains forms that can be filled out in a browser). The problem here is that if you or your client has InfoPath installed on their computer, everytime they click the link the form will try and open in their InfoPath client; prompting them for authentication.
If the client goes to the forms library itself and clicks on a InfoPath form the form opens in the browser no problem, why? The answer is in the url, try this:
REF: http://suguk.org/blogs/sharepointhack/archive/2007/05/06/3281.aspx
Scenario and solution:
You have a page that containd web part views into your forms library (that contains forms that can be filled out in a browser). The problem here is that if you or your client has InfoPath installed on their computer, everytime they click the link the form will try and open in their InfoPath client; prompting them for authentication.
If the client goes to the forms library itself and clicks on a InfoPath form the form opens in the browser no problem, why? The answer is in the url, try this:
- Go to the forms libray and click on a form, check the URL; it should look something like this:
http://site.example.com/subsite/_layouts/FormServer.aspx?XmlLocation=/subsite/formLibrary/formName.xml&Source=http%3A%2F%2Fsite%2Eexample%2Ecom%2Fsubsite%2FformLibrary%2FForms%2FMyView%2Easpx&DefaultItemOpen=1 - Now go the web part and click the same form, check the URL (in the browser status bar): http://site.example.com/subsite/formLibrary/formName.xml
- Note that the URL is completely different which is why I think the form does not want to open in the web browser view.
Now, to fix the URL in the web part we are going to need to convert that web part to a data view web part through sharepoint designer:
- Open one of your forms from the form library and copy the URL into NotePad.
- Open the offending page containing the web part in sharepoint designer.
- Go to design view, right click the web part and select convert to xslt data view.
- Select the ">" next to the data field that you want displayed as the link to the file and then select the option to format the text as a hyperlink.
- In the new dialog box, in the location text box paste the URL from NotePad.
- Replace the following text: "XmlLocation=/subsite/formLibrary/formName.xml" in the location text box with "mailto:XmlLocation=%7B@FileRef%7D" this tag indicated the full URL to the form.
- Save
Open the web part page and click the link in the web part: the form now opens in a web browser!
People Picker Control for Infopath 2007
Ever wanted to have a people picker kind of control in Infopath form and that too in browser mode. Did i heard yes :) , well there is a Active-X control which takes care of this part named "Contact Selector Control".Just follow the steps to get it working :
Add Contact Selector to Controls Pane
Click the "Add or Remove Controls " from the Control Task pane as shown in figure

Click ADD
Select Active-X
This will display a list of controls , select "Contact Selector" ,click Next
Select "Don't include a .cab file"
From drop down select "Field or Group(any data type) and click finish
DataSource for the Contact Selector control
Add non Repeating group named "group1"
Add a repeating Group names "Person"
Add following test field to the "Perosn " group (DisplayName,AccountId,AccountType)

Add Secondary datasource XMl file with details about the SharePoint Server , this is required by the form in order to validate the user against a particular sharepoint server .
Open Notepad and add the following Tag
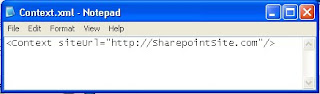
Save the file as Context.xml
Add new connection as "Receive Type" and source of data as "XML"
Option “Include the data as a resource file” shoule be enabled

Drag control to the form and you are all set .Best of Luck !!!!
Posted by Raghu Iyer at 9:55 AM
Labels: Infopath 2007
REF: http://metahat.blogspot.com/2007/05/people-picker-control-for-infopath-2007.html
----------------------------------
See Also: http://www.sharepointassist.com/2009/02/27/adding-a-contact-selectorpeople-picker-to-an-infopath-form/
Add Contact Selector to Controls Pane
Click the "Add or Remove Controls " from the Control Task pane as shown in figure
Click ADD
Select Active-X
This will display a list of controls , select "Contact Selector" ,click Next
Select "Don't include a .cab file"
From drop down select "Field or Group(any data type) and click finish
DataSource for the Contact Selector control
Add non Repeating group named "group1"
Add a repeating Group names "Person"
Add following test field to the "Perosn " group (DisplayName,AccountId,AccountType)

Add Secondary datasource XMl file with details about the SharePoint Server , this is required by the form in order to validate the user against a particular sharepoint server .
Open Notepad and add the following Tag

Save the file as Context.xml
Add new connection as "Receive Type" and source of data as "XML"
Option “Include the data as a resource file” shoule be enabled

Drag control to the form and you are all set .Best of Luck !!!!
Posted by Raghu Iyer at 9:55 AM
Labels: Infopath 2007
REF: http://metahat.blogspot.com/2007/05/people-picker-control-for-infopath-2007.html
----------------------------------
See Also: http://www.sharepointassist.com/2009/02/27/adding-a-contact-selectorpeople-picker-to-an-infopath-form/
InfoPath - Using the Contact Selector Control
By Scott Heim (Support Engineer)
We have seen a number of requests on how to allow a user to enter (or select) a person’s name or logon alias and then validate that user against their Active Directory without using code. This has been especially true in workflow scenarios where User A needs to enter in the name of User B – the next person in the workflow process.
Well, InfoPath 2007 ships with a control called Contact Selector Control that will resolve these issues! You may have seen our older article on the subject; this one aims to dive in deeper.
The Contact Selector control is an ActiveX control but it is a special cased control, in that it can also be used in InfoPath browser forms. To use this control there are specific steps that need to be taken – let’s take a look at those now.
Step 1: Add the Contact Selector control to your Controls Task Pane
1) From the Controls Task Pane click the Add or Remove Custom Controls link
2) Click the Add button
3) On the first screen of the Add Custom Control Wizard select ActiveX control and click Next
4) From the list of controls, choose Contact Selector and click Next
5) Select “Don’t include a .cab file” and click Next
6) For Binding Property select Value and click Next
7) From the Field or group type box choose Field or group (any data type) and click Finish
8) Click Close and then click OK
Step 2: Create the data structure for the Contact Selector Control
The Contact Selector control needs to have a specific data structure to work properly – this is documented on the “Items” tab of the Properties screen for the control; however, we’ll include that information here as well.
**IMPORTANT!** Spelling and capitalization must be exactly the same, starting with the “Person” group!
1) Add a non-Repeating Group named: gpContactSelector
2) Add a Repeating Group named: Person
3) Add the following 3 text fields to the Person group: DisplayName, AccountId and AccountType

We have seen a number of requests on how to allow a user to enter (or select) a person’s name or logon alias and then validate that user against their Active Directory without using code. This has been especially true in workflow scenarios where User A needs to enter in the name of User B – the next person in the workflow process.
Well, InfoPath 2007 ships with a control called Contact Selector Control that will resolve these issues! You may have seen our older article on the subject; this one aims to dive in deeper.
The Contact Selector control is an ActiveX control but it is a special cased control, in that it can also be used in InfoPath browser forms. To use this control there are specific steps that need to be taken – let’s take a look at those now.
Step 1: Add the Contact Selector control to your Controls Task Pane
1) From the Controls Task Pane click the Add or Remove Custom Controls link
2) Click the Add button
3) On the first screen of the Add Custom Control Wizard select ActiveX control and click Next
4) From the list of controls, choose Contact Selector and click Next

5) Select “Don’t include a .cab file” and click Next
6) For Binding Property select Value and click Next
7) From the Field or group type box choose Field or group (any data type) and click Finish

8) Click Close and then click OK
Step 2: Create the data structure for the Contact Selector Control
The Contact Selector control needs to have a specific data structure to work properly – this is documented on the “Items” tab of the Properties screen for the control; however, we’ll include that information here as well.
**IMPORTANT!** Spelling and capitalization must be exactly the same, starting with the “Person” group!
1) Add a non-Repeating Group named: gpContactSelector
2) Add a Repeating Group named: Person
3) Add the following 3 text fields to the Person group: DisplayName, AccountId and AccountType
Step 3: Add and bind the Contact Selector control to the View
1) Drag the gpContactSelector Group to the View and select “Contact Selector” from the list of controls
1) Drag the gpContactSelector Group to the View and select “Contact Selector” from the list of controls

2) You’re almost done…! :-)
Step 4: Add a secondary data source XML file which specifies the SharePoint server
The Contact Selector control needs to know the “context” of where the user validation should occur. These steps are not necessary if you are only displaying the form in a browser from SharePoint – in this case, it uses the context of the site from where it was provisioned; however, if you are in a mixed client/browser scenario you will need to include this XML file so forms opened in the client can use this functionality.
1) Launch Notepad
2) Copy and paste this one-line XML:
**NOTE: Replace
3) Save this as: Context.xml (again – naming and capitalization are important)
4) Add Context.xml as a “Receive” type Secondary Data Connection to your form template and make sure the option “Include the data as a resource file” is enabled
Step 5: Test!
You should now be able to Preview the form, enter a name or logon alias, click the “Check Names” button and resolve the name! Alternatively you could click the “To” button to perform a Search if you do not know the complete name of the user.
One other important point: if this control is something you will use numerous times, this process works great to create a “Contact Selector Template Part” – then you only have to complete these steps one time!
REF: http://blogs.msdn.com/infopath/archive/2007/02/28/using-the-contact-selector-control.aspx
Subscribe to:
Posts (Atom)