REF: http://www.endusersharepoint.com/2010/01/18/implement-your-first-content-slider-in-sharepoint/comment-page-1/#comment-25558
This article is part of a continuing series, jQuery for the Common Man, that walks through simple jQuery solutions, step-by-step. In this installment, we upload and configure a simple content slider in SharePoint.
So now we’re at the point where we have to implement the image slider we have selected. If you’ve been following along with the series, you’ve got your SharePoint Scripting Resource Center in place and you’ve investigated a few jQuery sliding solutions. As a reminder, I chose Chris Coyier’s “AnythingSlider jQuery Plugin“.
The first thing I did was unzip the package on my harddrive, and then click the index.html file to see what would happen. It worked flawlessly. I popped open the index.html file in TextPad to check out the code and clean up the HTML a bit. I saved that file as EUSPSlider.html.
That started me thinking about the simplest way to get the solution to work in SharePoint. Here are the steps I’m planning on taking:
Friday, January 22, 2010
How to get an SPD Workflow to Run at a Specific Time
REF: http://www.endusersharepoint.com/2010/01/11/how-to-get-an-spd-workflow-to-run-at-a-specific-time-employee-vacation-reminder-part-1/
In this article, we’re going to look at how to fire off an SPD workflow at a specific time of day for a fixed number of days. Thanks to “IAIN” on the “STP Forums” (once again) for asking the question on how to build this out for use with an employee vacation tracking list.
The Setup
The question we have is, how do we tell a workflow to fire off at a specific time of day (8 AM for example) in order to send out an email reminder to let people know who’s on vacation for that day? Additionally (and adding in another level of complexity), how can we make it somewhat-automated so that when the employee returns from vacation, the workflow process ends?
Both pieces of this would be rather simple in the programming world, but for an SPD Workflow, we’ll have to get a bit creative in order to create this functionality (all “out-of-the-box” as well).
Thursday, January 21, 2010
How to attach multiple attachments on a browser based form
REF: http://www.infopathdev.com/forums/p/13502/47860.aspx
File attachement controls ARE allowed in browser forms. If your data structure is correct, there is no reason the previously attached attachment would repeat.
Simply drag a repeating section onto the form, then drag a file attachment control into that repeating section. InfoPath will generate a data source with the base64 field INSIDE the repeating group. If you want to create the data source yourself, first, create a repeating group and then, inside it, add the base64 field.
Mind you, if you already have a form in use with the field as a non repeating field and not in a repeating group, moving it will probably cause data loss in existing forms.
Wednesday, January 20, 2010
How to Redirect to an Sharepoint Home Page after cliking on the submit button
How to Redirect to an Sharepoint Home Page after cliking on the submit button in the infopath form placed in an XmlFormView Webpart
REF: http://www.infopathdev.com/forums/t/14149.aspx
HttpContext.Current.Response.Redirect("http://yoursite.com/somepage.aspx", true);
If not try the following
I have a webpart that links to infopath forms and I do the following for the hyperlink
(Sitehostingthexml + "/_layouts/FormServer.aspx?XmlLocation=/yourlibrary/yuorxml.xml" + "&Source=/_layouts/windowclose.htm&DefaultItemOpen=1&OpenIn=Browser");
Windowclose.htm should reside in "C:\Program Files\Common Files\Microsoft Shared\web server extensions\12\TEMPLATE\LAYOUTS"
the code for windowclose.htm is below. What I do is close the form you could do a redirect via javascript.
Please Close the following screen.
Thank You
Tuesday, January 19, 2010
Cascading Drop downs in InfoPath Web Forms made easy
Posted by Frederik Van Lierde
REF: http://blueinfopath.blogspot.com/search?updated-max=2008-12-08T09%3A54%3A00-08%3A00&max-results=7
To create user‐friendly web forms, cascading drop down list boxes is a must, but InfoPath Form Services doesn’t allow you to use them, like you can use them with InfoPath Client. (Filter Data on DataConnections/DataSources are not allowed with InfoPath Web Forms)
This article explains how to use Cascading Drop down list boxes within an InfoPath Web Form in a very easy and re-usable way.
Please download the PDF file containing the step by step guide HOW_TO_use_Cascading_Dropdown_ListBoxes_within_an_InfoPath_Web_Form.pdf
Auto-Generating Filenames for InfoPath Forms
Posted by Clayton Cobb on June 20, 2009
REF: http://claytoncobb.wordpress.com/2009/06/20/auto-generating-filenames-for-infopath-forms/
Auto-Generating Filenames for InfoPath Forms – I see this topic come up a LOT on forums all over the place, so instead of continuing to answer the question time and time again, I am going to post a quick blog entry showing the steps. I think this stuff is fairly simple, but it just doesn’t pop into your head initially. Once you see it and understand it, you’ll think it’s simple, too. Keep in mind that I focus entirely on SharePoint-based InfoPath forms and for the most part BROWSER-ENABLED forms. So, it’s possible and likely that all concepts explained here will work for non-browser forms and non-SharePoint forms, but just remember that my perspective is mostly browser-enabled. The basis for this topic is that the standard method for submitting InfoPath browser-enabled forms is for the user to click Save at which point the user is prompted to give a filename along with choosing to allow overwrite. I really dislike this feature, because users have no concept of proper naming convention for the most part, and there’s no way to guarantee they create a unique or meaningful filename. I also just don’t like the user getting prompted. I prefer for the user to just click a button that saves the file to SharePoint with a dynamically-defined filename, closes the form, and takes the user back to the forms library. Ok, so how do we do ensure these few things:
The filename must be unique
The filename must persist through subsequent edits of the form without the user having to do anything
The built-in toolbar buttons must be hidden
A custom button must be created to do it all
Here are the steps:
Create the field for storing the filename
Create the Submit data connection that uses this field
Disable the browser-based toolbar functions
Create the custom submit button
Create a hidden field for storing filename
Create a strFilename field (Text). Do not set any conditional formatting, rules, or data validation on this. Add it to the canvas for now and make it read-only (Fig 1). This will be visible for testing purposes only.
Fig 1 – Create hidden field named strFilename
Create a Submit data connection that uses the strFilename field for dynamically creating the filename
Create a SUBMIT data connection in your form template that connects to the Form Library where the form resides. Put in the URL of your Form Library for the “Document Library” field, and choose the strFilename data element for “File name” field by using the fx button. Check the box for “Allow overwrite if file exists” (Fig 2).
Fig 2 – Creating the Submit data connection for the Form Library
Disable toolbar options
Click Tools > Form Options > Browser. Uncheck Save, and Save As (Fig 3). Submit should be grayed since it has not been configured. If it has been configured, be sure it is unchecked. Update should be unchecked by default, so leave it. I personally uncheck “Views,” since I use views to dynamically route people to certain information based off their identity or the form’s workflow status, but it’s up to you. If your form is not browser-enabled, use the Open and Save menu in Form Options to uncheck Save and Save As.
Fig 3 – Disabling toolbar functions for Browser-Enabled Forms
Create the custom Submit button
Drag a button control to your canvas and double-click it to get to its properties. Change the display name to “Submit” or whatever you prefer, then click Rules. You want to add two rules, each with one condition (Fig 4).
Fig 4 – Custom Submit button with two rules
The first rule allows you to Edit the existing form without changing strFilename, then close it (Fig 5).
Set a condition rule to have one condition stating that strFilename is not blank.
Add two actions in this order:
Submit to your SharePoint Library Submit data connection
Close
Fig 5 – Editing the form with the submit data connection
Here, we are simply submitting the form back to the library in a manner that will not change any metadata and will overwrite the existing file of the same name. This is the whole reason for the strFilename field. We do not want the strFilename to be recreated each time the form is edited. This rule is placed before the Submit rule for the same reason as stated above. We need to check first to see if the form has already been submitted. If so, then we submit using the current strFilename. If not, then we skip this rule.
The second rules will Submit the current form only if it is brand new and after dynamically creating the strFilename, then it closes the form.
Set a condition rule to have one condition stating that strFilename is blank.
Add three actions in this order:
Set the Value of strFilename (Fig 6) to the concatenated string combining userName() with now(). The formula is concat(userName(), now()). The Xpath is concat(xdUser:get-UserName(), xdDate:Now()). Note: I add a text hyphen in the middle to make it a little easier to read, but that’s up to your discretion.
Submit to your SharePoint Library Submit data connection
Close
Fig 6 – Setting the dynamic filename prior to submission
Here, we are submitting the form to the form library for the first time. This is why we first dynamically create the strFilename, because the Submit data connection uses this field to create the filename in SharePoint. We only want to do this step upon first submission, so that is why this rule only runs if the strFilename is blank. Doing this rule last keeps us from double-submitting, because the Edit rule would run right after the Submit rule due to its condition being met (strFilename is not blank). You can of course choose any concatenation formula you want as long as it is unique. This particular formula can only create a non-unique filename if the same user submits two separates forms (two browser forms open simultaneously) at the same EXACT second.
Publish your form to a new form library, and set that library to Display in Browser (Advanced Settings). Click New to create a new form (Fig 7)
Fig 7 – A new form before submission
Click submit, and it should take you back to the library with no prompts or delays. You will see a new form with a unique filename (Fig 8). The now() function gives the date AND time separate by the letter “T.”
Fig 8 – Newly-created form has unique filename
Click on that new form and notice that the strFilename field has been populated with the same info you saw for the filename in the library (Fig 9). This field is actually populated FIRST when you submit, because it forms the basis for the filename in the Submit data connection. Click submit again and notice that the existing file has been changed rather than a new file being created.
Fig 9 – strFilename field is populated with the dynamic, unique filename
Reference links for related articles:
InfoPath Submit Error- A value
Monday, January 18, 2010
InfoPath - GetUserProfileByName - Get user information on another person
You can obtain the functionality by using the webservice called: userprofileservice.asmx. Take a look at this guide:
http://blogs.microsoft.co.il/blogs/itaysk/archive/2007/04/05/InfoPath-_2D00_-Get-the-current-user-without-writing-code.aspx?
This guide does not have an example of how to get user information on another person. You can do this by:
http://blogs.microsoft.co.il/blogs/itaysk/archive/2007/04/05/InfoPath-_2D00_-Get-the-current-user-without-writing-code.aspx?
This guide does not have an example of how to get user information on another person. You can do this by:
- Adding a field
- Adding a button
- Actions for the button:
- Set field value: GetUserProfileByName:myfields:QueryFields:AccountName = The field you added in step 1
- Recieve data with GetUserProfileByName
- Now you have populated the GetUserProfileByName with all the data on the new user from the SharePoint user profile database.
- Perform step 1 to 11 followng the guide in the link above to fill out fields of your choice
Tip of the day: The above mentioned method will leave you with a very rigid input field to get info on a new user. To solve this problem you can use the contact selector. Google: "InfoPath Contact Selector".
Done :-)
If this is making no sense at all let me know.
Best regards
REF: http://www.infopathdev.com/forums/p/7844/29319.aspx#29319
Using InfoPath 2007 Translate function to do what XPath lower-case function does
REF: http://blog.michaellotter.com/post/0a09090909-Using-InfoPath-2007-Translate-function-to-do-what-XPath-lower-case-function-does0a-0a090909.aspx

If you foresee yourself using this more often then something to consider is creating a “Template Part” for this. It would be very simple because it would have two fields one called “translate_uppercase” and another “translate_lowercase” and each field default value would be the alphabet in the correct case. Then whenever you would want to use the “Translate” function you would add the “Translate Lower Case Template Part” to the form and build the expression as translate(fieldname, translate_uppercase, translate_lowercase). This would be a lot simpler than typing in all those letters and if you have more than one person doing InfoPath development it would create a standard way of doing it.
Several days ago Joe and I found ourselves wanting to make sure we made the InfoPath “UserName()” function return all lower case characters and we decided to use the common XPath function “lower-case” but was surprised because it didn’t work. With a little research I found that we could use the InfoPath “Translate” function instead. I must say that it’s a little frustrating that some common XPath functions don’t work and you have to find the work around but if you do any InfoPath development you come accustom to it. Below is what we tried that didn’t work and what we did that did work.
What didn’t work:
lower-case(xdUser:get-UserName())
lower-case(xdUser:get-UserName())
What did work:
translate(InsertFieldHere, "ABCDEFGHIJKLMNOPQRSTUVWYXZ", "abcdefghijklmnopqrstuvwyxz")
translate(InsertFieldHere, "ABCDEFGHIJKLMNOPQRSTUVWYXZ", "abcdefghijklmnopqrstuvwyxz")

Basically for “Translate” we had to specify every letter in the alphabet in UPPERCASE and then lowercase to make sure every character will get translated. For more information on “Translate” checkout this link http://office.microsoft.com/en-us/infopath/HA012330391033.aspx and do a search for “Translate” for the official description (It’s towards the bottom of the page).
If you foresee yourself using this more often then something to consider is creating a “Template Part” for this. It would be very simple because it would have two fields one called “translate_uppercase” and another “translate_lowercase” and each field default value would be the alphabet in the correct case. Then whenever you would want to use the “Translate” function you would add the “Translate Lower Case Template Part” to the form and build the expression as translate(fieldname, translate_uppercase, translate_lowercase). This would be a lot simpler than typing in all those letters and if you have more than one person doing InfoPath development it would create a standard way of doing it.
Syntax
translate(argument1, argument2, argument3)
translate(argument1, argument2, argument3)
- argument1 The name of the field that contains the text whose characters will be replaced. Separate arguments with a comma.
- argument2 A character or the value of a field with a text data type that will be replaced by the characters in the third argument. Separate arguments with a comma.
- argument3 A character or the value of a field with a text data type that will replace every instance of the character in the second argument
Note: This should be used with caution though because it has a significant impact on performance. The translate function is SOOOO much more demanding than the lower-case function.
Thursday, January 14, 2010
Forcing InfoPath form links to load in web browser
by: dougthebuilde (formerly bobthebuilder)
REF: http://suguk.org/blogs/sharepointhack/archive/2007/05/06/3281.aspx
Scenario and solution:
You have a page that containd web part views into your forms library (that contains forms that can be filled out in a browser). The problem here is that if you or your client has InfoPath installed on their computer, everytime they click the link the form will try and open in their InfoPath client; prompting them for authentication.
If the client goes to the forms library itself and clicks on a InfoPath form the form opens in the browser no problem, why? The answer is in the url, try this:
- Go to the forms libray and click on a form, check the URL; it should look something like this:
http://site.example.com/subsite/_layouts/FormServer.aspx?XmlLocation=/subsite/formLibrary/formName.xml&Source=http%3A%2F%2Fsite%2Eexample%2Ecom%2Fsubsite%2FformLibrary%2FForms%2FMyView%2Easpx&DefaultItemOpen=1 - Now go the web part and click the same form, check the URL (in the browser status bar): http://site.example.com/subsite/formLibrary/formName.xml
- Note that the URL is completely different which is why I think the form does not want to open in the web browser view.
Now, to fix the URL in the web part we are going to need to convert that web part to a data view web part through sharepoint designer:
- Open one of your forms from the form library and copy the URL into NotePad.
- Open the offending page containing the web part in sharepoint designer.
- Go to design view, right click the web part and select convert to xslt data view.
- Select the ">" next to the data field that you want displayed as the link to the file and then select the option to format the text as a hyperlink.
- In the new dialog box, in the location text box paste the URL from NotePad.
- Replace the following text: "XmlLocation=/subsite/formLibrary/formName.xml" in the location text box with "mailto:XmlLocation=%7B@FileRef%7D" this tag indicated the full URL to the form.
- Save
Open the web part page and click the link in the web part: the form now opens in a web browser!
People Picker Control for Infopath 2007
Ever wanted to have a people picker kind of control in Infopath form and that too in browser mode. Did i heard yes :) , well there is a Active-X control which takes care of this part named "Contact Selector Control".Just follow the steps to get it working :
Add Contact Selector to Controls Pane
Click the "Add or Remove Controls " from the Control Task pane as shown in figure

Click ADD
Select Active-X
This will display a list of controls , select "Contact Selector" ,click Next
Select "Don't include a .cab file"
From drop down select "Field or Group(any data type) and click finish
DataSource for the Contact Selector control
Add non Repeating group named "group1"
Add a repeating Group names "Person"
Add following test field to the "Perosn " group (DisplayName,AccountId,AccountType)

Add Secondary datasource XMl file with details about the SharePoint Server , this is required by the form in order to validate the user against a particular sharepoint server .
Open Notepad and add the following Tag
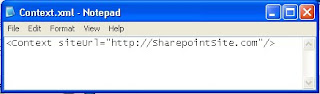
Save the file as Context.xml
Add new connection as "Receive Type" and source of data as "XML"
Option “Include the data as a resource file” shoule be enabled

Drag control to the form and you are all set .Best of Luck !!!!
Posted by Raghu Iyer at 9:55 AM
Labels: Infopath 2007
REF: http://metahat.blogspot.com/2007/05/people-picker-control-for-infopath-2007.html
----------------------------------
See Also: http://www.sharepointassist.com/2009/02/27/adding-a-contact-selectorpeople-picker-to-an-infopath-form/
Add Contact Selector to Controls Pane
Click the "Add or Remove Controls " from the Control Task pane as shown in figure
Click ADD
Select Active-X
This will display a list of controls , select "Contact Selector" ,click Next
Select "Don't include a .cab file"
From drop down select "Field or Group(any data type) and click finish
DataSource for the Contact Selector control
Add non Repeating group named "group1"
Add a repeating Group names "Person"
Add following test field to the "Perosn " group (DisplayName,AccountId,AccountType)
Add Secondary datasource XMl file with details about the SharePoint Server , this is required by the form in order to validate the user against a particular sharepoint server .
Open Notepad and add the following Tag

Save the file as Context.xml
Add new connection as "Receive Type" and source of data as "XML"
Option “Include the data as a resource file” shoule be enabled
Drag control to the form and you are all set .Best of Luck !!!!
Posted by Raghu Iyer at 9:55 AM
Labels: Infopath 2007
REF: http://metahat.blogspot.com/2007/05/people-picker-control-for-infopath-2007.html
----------------------------------
See Also: http://www.sharepointassist.com/2009/02/27/adding-a-contact-selectorpeople-picker-to-an-infopath-form/
$().SPServices.SPCascadeDropdowns
Function$().SPServices.SPCascadeDropdowns
FunctionalityThe SPCascadeDropdowns function lets you set up cascading dropdowns on SharePoint forms. What this means is that you can enforce hierarchical relationships between column values. The function uses the GetListItems operation of the Lists Web Service to refresh the allowable values based on relationships which are maintained in reference lists. By implementing this function, there are no coding requirements to manage the hierarchical relationships (once it is in place) and you can let your users manage the content in the reference lists.
This function works with any number of options in the dropdowns as well as multi-select parent and child columns, as shown in the following table. This is significant because each of the three column types are rendered significantly differently by SharePoint.
When the relationshipList contains lookup columns for both the relationshipListParentColumn and relationshipListChildColumn columns, the function uses the relationshipListParentColumn's ID rather than the relationshipList item's ID. This means that "secondary lists" are also supported.
Find out more here
REF: http://spservices.codeplex.com/wikipage?title=%24%28%29.SPServices.SPCascadeDropdowns&referringTitle=Documentation
InfoPath - Using the Contact Selector Control
By Scott Heim (Support Engineer)
We have seen a number of requests on how to allow a user to enter (or select) a person’s name or logon alias and then validate that user against their Active Directory without using code. This has been especially true in workflow scenarios where User A needs to enter in the name of User B – the next person in the workflow process.
Well, InfoPath 2007 ships with a control called Contact Selector Control that will resolve these issues! You may have seen our older article on the subject; this one aims to dive in deeper.
The Contact Selector control is an ActiveX control but it is a special cased control, in that it can also be used in InfoPath browser forms. To use this control there are specific steps that need to be taken – let’s take a look at those now.
Step 1: Add the Contact Selector control to your Controls Task Pane
1) From the Controls Task Pane click the Add or Remove Custom Controls link
2) Click the Add button
3) On the first screen of the Add Custom Control Wizard select ActiveX control and click Next
4) From the list of controls, choose Contact Selector and click Next
5) Select “Don’t include a .cab file” and click Next
6) For Binding Property select Value and click Next
7) From the Field or group type box choose Field or group (any data type) and click Finish
8) Click Close and then click OK
Step 2: Create the data structure for the Contact Selector Control
The Contact Selector control needs to have a specific data structure to work properly – this is documented on the “Items” tab of the Properties screen for the control; however, we’ll include that information here as well.
**IMPORTANT!** Spelling and capitalization must be exactly the same, starting with the “Person” group!
1) Add a non-Repeating Group named: gpContactSelector
2) Add a Repeating Group named: Person
3) Add the following 3 text fields to the Person group: DisplayName, AccountId and AccountType
Step 3: Add and bind the Contact Selector control to the View
1) Drag the gpContactSelector Group to the View and select “Contact Selector” from the list of controls
1) Drag the gpContactSelector Group to the View and select “Contact Selector” from the list of controls

2) You’re almost done…! :-)
Step 4: Add a secondary data source XML file which specifies the SharePoint server
The Contact Selector control needs to know the “context” of where the user validation should occur. These steps are not necessary if you are only displaying the form in a browser from SharePoint – in this case, it uses the context of the site from where it was provisioned; however, if you are in a mixed client/browser scenario you will need to include this XML file so forms opened in the client can use this functionality.
1) Launch Notepad
2) Copy and paste this one-line XML:
**NOTE: Replace
3) Save this as: Context.xml (again – naming and capitalization are important)
4) Add Context.xml as a “Receive” type Secondary Data Connection to your form template and make sure the option “Include the data as a resource file” is enabled
Step 5: Test!
You should now be able to Preview the form, enter a name or logon alias, click the “Check Names” button and resolve the name! Alternatively you could click the “To” button to perform a Search if you do not know the complete name of the user.
One other important point: if this control is something you will use numerous times, this process works great to create a “Contact Selector Template Part” – then you only have to complete these steps one time!
REF: http://blogs.msdn.com/infopath/archive/2007/02/28/using-the-contact-selector-control.aspx
Managing Links with the “I need to…” Web Part
Author: Nicola Young
It’s time to decide the best way to display your links on a page.
If you are using MOSS, you have what I consider five options: Links List, Content Editor Web Part, Content Query Web Part, Summary Links Web Part, and I Need to.. Web Part. It really comes down to how many links are you trying to display.
Maybe you only have 2-5 links and one of the first four options will be fine. But if you have any more than that all of sudden your page is just covered with links.
While I think the first four options listed all have value, the biggest problem I have with them is screen real estate which is why I choose the fifth option frequently, the I Need to… web part. For this article I am going to assume you know how to use the first four and we are going to walk through how to turn the I Need to… web part into a drop down links list.
The “I need to…” web part can help
The I Need to… web part was originally intended to connect to the Site list in the Sites Directory as an easy way for your users to navigate. However it works well as a links drop down for any type of links whether they are internal or external.
In order to do this, you need to create a custom links list. This is because the built in links list does not have a title column which is what is displayed in the dropdown nor does it have a choice column which the web part uses for filtering.
The first three steps listed below will walk you through setting up the list.
Create a Custom List with the following Columns.
Title
Type
Title (should be created by default)
Single line of text
URL
Hyperlink
Yes/No
Choice column; yes, no should be the choices
Add a couple of items filling in all three columns. The web part is going to ask you to filter the choice column, so if you would like all of the items to show up make sure you are selecting Yes for the Yes/No column.
Go to the homepage of your site, in the right hand column add the I Need to.. web part. When you have the web part in edit mode configure it as follows: (Note: the list name should be the custom list you created in the first step)
If you would like to change the width of the web part, you can do it with the width option seen above. This would allow you to accommodate links with a lot of characters.
Now your web part should look similar to this
After I demonstrate the above functionality of a links drop down clients frequently ask how do I customize the fact that the web part says “Choose a task”. The following are the steps you will need to take to accomplish this.
The next step is to change the text in the web part from “Choose task” to “Choose Link”, to do this on the drop down of the web part select export. Save the web part to your desktop.
Click Open and Use SharePoint Designer or Notepad to open the file. To change the word task to link in the default text of the web part, Locate this line of code approximately line 75
<option selected="true" value="0">Choose task</option> Change “Task” to “Link”
To change the tooltip, Locate this line of code approximately line 74
<select id="{$TasksAndToolsDDID}" class="ms-selwidth" style="width:{$tasksAndTools_Width}" size="1" title="Choose a task that you need to perform" >Change “task” to “link”; you may want to delete “that you need to perform” or reword the tooltip altogether.
Save the File
Go back to the homepage of your site. Put the page in edit mode and click add a web part. In the bottom right hand corner of the web part gallery click Advanced Web Part Gallery and Options.
Select the drop down arrow in the top right hand corner of the web part task pane. On the drop down select import.
Browse to the file you just saved and click upload.
Click Import.
Be sure to delete the first I need to… web part off of the page.
Conclusion
So that is it, with a few simple changes to the code you can customize the web part and create a very functional efficient drop down list of links with custom messages and tooltips.
The same simple steps used here to customize the web part can be used with other web parts that have been exported. This may help you to start thinking about other problems you can fix with this type of solution. Hopefully you will at least find this useful when you get the request for everyone’s link on the homepage as I frequently do when I am designing a new homepage layout.
As always, we are happy to receive any feedback from you regarding topics you would like us to address. Leave it in the comments below.
REF: http://www.endusersharepoint.com/2009/01/29/managing-links-with-the-i-need-to-web-part/
InfoPath – Get User Information Without Writing Code (extended)
Posted by Clayton Cobb on June 21, 2009
In terms of free, out-of-the-box functions, I consider the UserProfileService to be the most powerful thing that can be used in SharePoint-based InfoPath forms. Itay Shakury made this wonderful blog post over two years ago that told us how to Get the current user without writing code. That blog post is so popular that Itay is still answering questions as recently as TODAY (June 20th, 2009). What we will talk about today is how to take this concept and extend it further so that you can get any profile info for any user by querying within the form after it has been opened through rules triggered by changed fields and buttons. One specific example will be to use the Manager node to get the manager’s additional info. Let’s begin…
Note: The following assumes you have already implemented the UserProfileService solution above, specifically the GetUserProfileByName method…
Another Note: The UserProfileService does NOT touch Active Directory. It only touches the Profile Database, which is part of the SSP, so it requires you to be importing profiles through the SSP to populate this database, because that’s where all the information comes from. The profile import pulls data from Active Directory, so it’s like connecting to AD, but not directly. Therefore, this web service is only available through MOSS and not WSS 3.0. For anyone who would like to do the same things but without having this web service, please consider using the Qdabra Active Directory Web Service that can be used in any type of InfoPath form as long as the organization uses Active Directory.
This write-up will be very involved, so in order to keep it from being 20 pages long, I’m going to explain certain concepts in detail ONCE, and then I will refer to that concept multiple times later without having to show more screenshots. Hopefully, that works. The 4 main ways we will be using the UserProfile Service:
Populating default information upon form load
Populating queried information with a button
Populating queried information with a dropdown tied to a secondary data connection
Getting Manager info
These are the steps we’ll take:
Create form template with all relevant data elements
Create layout table showing data groupings
Create form library
Create UserName custom list
Create Data Connections – GetUserProfileByName web service, AutoFilename library Submit, and UserName list Receive
Configure all fields and buttons - default values and rules
Test Functionality
Create form template with all relevant data elements
You won’t need all of these for every form, but they are elements that I use for achieving some of the concepts. We’re combining all of the concepts, so you can either pick out what you need or build it all for practice, and then apply bits and pieces where applicable on your existing and future forms. The element names should be self-explanatory, so I’ll just use a screenshot to show you what should be built in the main data source (Fig 1)
Fig 1 – Form template showing all relevant data elements
Create layout table showing data groupings
In reality, you won’t end up showing most of these fields on the canvas of your forms, but they are showing here for testing and demonstration purposes. I recommend hiding most of the fields like the ones showing usernames and instead showing meaningful ones like the name fields. Again, the picture should be self-explanatory up front, so just follow this structure (Fig 2). Add a row for that custom button, then just drag the button to the canvas and rename it. We will configure it later. Also, do the same for the Submit and Close (optional) buttons below the table.
Fig 2 – Creating the layout table
Create form library
Create a basic Form Library on your SharePoint site. Go to Form Settings > Library Settings > Advance Settings > Display as Web Page (optional).
Create UserName custom list
Create a Custom List on your SharePoint Site. Change the Title column to UserName, and create another column named FullName. Populate this list with 3 known users (Fig 3) and be sure to use their exact username (i.e. ccobb) and not the domain name (i.e. domain\ccobb). For the Full Name, put whatever you prefer to use as a friendly name for that user.
Fig 3 – Creating the custom UserName list
Create Data Connections – GetUserProfileByName web service, AutoFilename library Submit, and UserName list Receive
Create 3 data connections (Fig 4) starting with the GetUserProfileByName web method from the first part of Itay’s blog entry.
Fig 4 – List of all Data Connections needed
Next, create the Submit data connection for submitting the form to your form library while using the strFilename data element (Fig 5). Ensure you select “Allow overwrite if file exists.”
Fig 5 – Submit using strFilename
Lastly, create a Receive data connection for retrieving the list of pre-defined usernames and full names. Be sure to select those two nodes when connecting to the list (Fig 6)
Fig 6 – Retrieve UserName and FullName from custom list
Configure all fields and buttons – default values and rules
There is a lot of work to do here, so bear with me. I’ll try to consolidate the similar settings to hopefully make it quicker to read and do. We have logic built in 5 places (not including the Submit and Close buttons):
strSubmitter – Default value and rules for setting other field values
strSubmitterMgr – Queries web service and a rule for setting other field values
Form Load – A rule for setting field values
btnCurrentMgrInfo – A rule for setting other field values
strSelectedUser – Bound to secondary data connection as a dropdown list, multiple web service queries, and actions for setting other field values. This field puts it all together into one action.
strSubmitter – Set the default value for this data element to the function userName() (Fig 7).
Fig 7 – Setting strSubmitter default value to userName()
Create a rule with 3 actions that sets the values of the other 3 submitter fields (Fig 8). Each action starts with “Set a field’s value,” but I have scrolled right to show the formulas. Each formula is from the 2nd half of Itay’s blog entry. I will show how to do the strSubmitterMgr rule as one example to follow for all three (Fig 9). The actions HAVE to be in this order, or at least make sure that strSubmitterMgr is last in line. Due to there being no conditions, this rule fires as soon as strSubmitter is populated by the userName() default value.
Fig 8 – Create a rule with 3 actions for strSubmitter
The formula for strSubmitterMgr is substring-after(Value[Name = "Manager"], “\”). The Xpath for that statement in my form is substring-after(xdXDocument:GetDOM(“GetUserProfileByName”)/dfs:myFields/dfs:dataFields/s0:GetUserProfileByNameResponse/s0:GetUserProfileByNameResult/s0:PropertyData/s0:Values/s0:ValueData/s0:Value[../../../s0:Name = "Manager"], “\”). I chose this for the example, because it is the most complicated. It is using the substring-after function to strip out all the data that comes after the backslash, because the value that returns for “Manager” is a full domain name (i.e. domain\ccobb). We only want the username (i.e. ccobb), thus the substring-after function. If you built your form exactly like mine, then you can click the Edit Xpath button and paste in the Xpath statement above. However, that would not teach you how to use the GUI to achieve this goal, and your forms won’t always follow this format, so this is how you create that formula (Fig 9).
Set the Action to “Set a field’s value.” Select strSubmitterMgr in the Field box. In the Value box, click the function button (fx). In the Formula box, type substring-after(, “\”) – copy and paste if you’d like. Then, put your cursor before the comma and click Insert Field or Group.
In Data Source, select GetUserProfileByName (secondary). Drill all the way down through the dataFields groups until you get to the Value node. Select the Value node, then click Filter Data.
Click Add
In the first dropdown, click select field or group. From there, do the same thing you did in step 3 above. Get back to the GetUserProfileByName data source and drill down until you see the Name node. Select that node, set the operand to is equal to, then set the last pulldown to the text of “Manager”
If done properly, then all of those boxes should look like Figure 9. Follow the same procedure for the other two fields in Figure 8 except for the substring-after function. Hint: at the Insert Formula screen, you can copy that statement and paste it in the same box when configuring other fields. You can then double click the Value[Name = "Manager"] part that is underlined and click through the settings to change the Name part of step 5.
Fig 9 – Creating the strSubmitterMgr formula to retrieve just the Manager’s username
strSubmitterMgr – As soon as the 3rd action from above completes for populating strSubmitterMgr, it is time to fire off another rule with 4 actions (Fig 10). The first 2 actions have to be in that order, and they have to be first. The last 2 actions are interchangeable. Be sure to place these rules on the strSubmitterMgr field and not the strSubmitter field!
Fig 10 – Create a rule with 4 actions for strSubmitterMgr
You already know how to do the last two actions, because they are exactly the same as the strSubmitter actions. Just be sure to remember and set the field values for strSubmitterMgrEmail and strSubmitterMgrName. We’ll now focus on the first two actions. The Query using a data connection: GetUserProfileByName is extremely simple. You just click Add Action and choose Query using a data connection in the Action pulldown. It then gives you another pulldown of data connections where you choose GetUserProfileByName. That’s it.
The first rule requires some direct attention, because it is where the magic happens for this entire blog entry. It looks simple and actually is simple, but it’s the part that people never think of or just don’t realize it can be done. All we are doing is setting the AccountName field to the current field’s data. Ok, so what is this AccountName field? We never created such a thing! Ah, well it’s the only node in the queryFields group of the GetUserProfileByName data connection. We are taking the Manager’s username from strSubmitterMgr and sending it to this field just before querying that web service. This sends the Manager’s username to the web service so that it will return the data set of profile information relevant to the Manager instead of the Submitter. This is the key to getting information other than the current user’s!
Here’s how you do it (Fig 11). Click Add Action. In the Action pulldown, select Set a field’s value; in Value, select strSubmitterMgr (should show a dot afterwards); in Field, click the Select a Field or Group button. In Data Source, choose GetUserProfileByName (secondary), then drill down through the queryFields nodes until you reach the AccountName node. Select it and click OK. Pretty simple, huh?
Fig 11 – Sending a new query value to the GetUserProfileByName web service
Form Load – For the form’s Open Behavior, you will set a rule with 8 actions, all of which you have done already in this blog entry (Fig 12). Here is a quick list of the actions and their formulas
strCurrentUser – Set field’s value to userName()
AccountName - Set fields value to strCurrentUser
Query GetUserProfileByName
strCurrentUserEmail – Set field’s value to Value[Name = "WorkEmail"]
strCurrentUserName – Set field’s value to Value[Name = "PreferredName"]
strCurrentUserMgr – Set field’s value to substring-after(Value[Name = "Manager"], “\”)
strCurrentUserMgrEmail – Set field’s value to NULL
strCurrentUserMgrName – Set field’s value to NULL (setting these to NULL so that btnCurrentMgrInfo works properly without keeping saved data in these fields when re-opening)
These steps are sending the current user’s username to the GetUserProfileByName web service, which returns a data set of profile info that is used to populate three other fields of information about the current user – WorkEmail, PreferredName, and Manager. This may be the same info as the submitter, but it can accommodate users other than the submitter.
Fig 12 – One rule with 12 actions to perform each time the form opens
The reason why we’re using the a default value on strSubmitter and a rule for strCurrentUser is because using a default value makes the data populate once and stay the same during subsequent edits. Since our current user may not be the same as the submitter, we must use a rule when the form opens to set strCurrentUser to the current user’s username while the strSubmitter field will always have the original submitter’s username. All of the Submitter fields populated above will remain static, because there is always only one submitter. The CurrentUser fields will always be dynamic depending on who opens the form.
btnCurrentMgrInfo – This is the button labeled Get Current Manager Info. This button will have one rule with 4 actions that are identical to the strSubmitterMgr rule above except that the data will be sent to different fields (Fig 13). You start by setting the AccountName of the GetUserProfileByName web service to the username of the current user’s Manager. You then query the web service with the Manager’s username, which returns a data set of profile information about the current user’s Manager. You then set the current user manager fields to their respective values of WorkEmail and PreferredName. This example is just illustrating how you can use a button to populate such info.
Fig 13 – One rule with 4 actions to perform on a button push
strSelectedUser – This example puts a lot of concepts together into one simple action of choosing a dropdown selection. You start by changing your strSelectedUser control to a dropdown box (the field next to Choose User). You then configure the dropdown to pull data from the UserNames list (Fig 14). First, you choose the radio button for Look up Values from an External Data Source. In the Data Souce, choose UserNames. In Entries, click the button and select the UserNames repeating group, then click Ok. For Value, choose the UserName node, and for Display Name, choose the FullName node. What this is going to do is show the user some friendly Full Names, but the values behind those selections will be actual User Names.
Fig 14 – Configuring strSelectedUser as a dropdown bound to the UserNames list
Next, create one rule on strSelectedUser with 5 actions (Fig 15). Again, these actions are now familiar, but we’re combining multiple steps into one rule and using one new concept. We first set the web service’s AccountName node to the value of strSelectedUser, which if you recall is the actual User Name of the name chosen in the pulldown. Next, we query the web service. Then, we take the User Name of the Manager of the person selected and set the web service’s AccountName to this value. Basically, we’ve iterated through the earlier processes in this blog entry without using separate data fields. We now have yet another data set of profile info, which allows us to do the last step. The last step is to set strSelectedUserMgr to the Full Name (FirstName concatenated with LastName) of the selected user’s Manager. So think about it, we started with a user selected in a pulldown and jumped all the way to that user’s manager’s friendly Full Name all in one simple click.
For the 3rd action, remember to use this formula to get the Manager’s username: substring-after(Value[Name = "Manager"], “\”). On the 5th step, use this new formula for concatenating the FirstName with the LastName (these are attributes from the web service): concat(Value[Name = "FirstName"], ” “, Value[Name = "LastName"]).
Fig 15 – Creating one rule with 5 actions on the strSelectedUser pulldown
The custom Submit button is optional, but if you’d like to use that concept, please use my other write-up on that topic: Auto-Generating Filenames for InfoPath Forms.
Test Functionality
Publish the form, go to the form library, then click New. In my example, I’m logged into the browser with an account named SharePoint Tester, and I am its manager. The form should be completely populated in the Submitter section, and it should be partially completed in the CurrentUser section. Notice the info is the same due to the fact that you are the submitter AND the current user, since you created this form as new. The Current User Manager info is not populated, because we have to push the button to populate it. The Selected User section is blank, because we have select a user from the pulldown first (Fig 16).
Fig 16 – Testing a new form
Submit your form, then re-open it with a different user account. In my example, I started with a tester account and then logged in as myself to view the submitted form. Notice that the Submitter information hasn’t changed, but the CurrentUser info now reflects the new user’s info, including that user’s manager’s username. Click on the Get Current Manager Info button and watch the next two fields get populated with the Current User’s Manager’s information (Fig 17).
Fig 17 – Current User info is dynamic and a button can be used to retrieve user profile info
For the last test, we will make a selection in the Choose User pulldown and see what happens. Choose one of the names in your pulldown and see if it populates the Selected User Manager field with that person’s manager’s full name (Fig 18).
Fig 18 – Use the value from a pulldown to determine that user’s manager’s Full Name
REF: http://claytoncobb.wordpress.com/2009/06/21/userprofileservice-extended/
InfoPath - Get The Current User Without Writing Code
Posted by Itay Shakury
I've just read IP team blog post about getting the current user's details using Web Services.Actually the exact same result can be achieved without writing any code. It's a very common thing to do and I couldn't find any guide for that, so here it is:* If you are already familiar with this, this post might still be useful. I have included the complete set of default properties get returned and their proper naming syntax at the bottom.* This works at InfoPath as well as InfoPath Forms Services.*Clayton Cobb has a great follow up post if you to take the this a step further.
I've just read IP team blog post about getting the current user's details using Web Services.Actually the exact same result can be achieved without writing any code. It's a very common thing to do and I couldn't find any guide for that, so here it is:* If you are already familiar with this, this post might still be useful. I have included the complete set of default properties get returned and their proper naming syntax at the bottom.* This works at InfoPath as well as InfoPath Forms Services.*Clayton Cobb has a great follow up post if you to take the this a step further.
- With InfoPath opened go to Tools > Data Connections, and click 'add...' to add a new data connection to the form. This opens up the Data Connection Wizard.
- We want to receive data from the WS about the current user, so choose receive data' and click next.
- Our data source is a WS so choose 'Web Service' and next.
- Now you will have to point the wizard to the WS. Type an address similar to this: http://ServerName/_vti_bin/UserProfileService.asmx and click next.
- Here you get a list of all methods for that WS, choose GetUserProfileByName and click next.
- In this screen you can specify what parameters are sent to the method, we are relying on the method's ability to return the current user name if no value is passed to it, so we will leave this as is (no value is passed to the method) and click next.
- Click next and make sure 'Automatically retrieve data when form is opened' is checked.
- Finish the wizard.
The GetProfileByName method returns a PropertyData array. You can think of it as a repeating table of name and value pairs. So Now that you have a data connection that can get the current users, you can use it values. In this example I will show the user's first name in a textbox.
- Add a textbox to the form.
- Go to the first textbox's properties (double click it).
- In the 'Default Value' part, click the 'fx' button next to the 'Value' field. this opens up the formula builder dialog.
- Click 'Insert field or group'.
- In the data sources drop down, choose the GetUserProfileByName data source.
- Expand all groups under the 'dataFields' group, and choose the 'value' field. Don't click OK yet!
- With data 'value' field selected, click the 'Filter Data...' button and 'Add...'.
- In the first drop down (value) select 'Select a field or group...' and choose the 'Name' field under the 'PropertyData' group.
- Leave the middle drop down as is ('is equal to') and in the last drop down choose 'type a text...'.
- This is the part where you specify which property to put in the textbox. As we said the method returns multiple properties about the user. For this textbox we want to put the user's first name in, so type 'FirstName' (this is case sensitive!). I have included the property list you can use here (just below), so if you want some other property, just type its name instead.
- That's it, all we have to do is to confirm everything so Click 'OK' for every open dialog box until you are back in the design mode.
- click 'Preview' and see the wonder!
- If you want more details repeat steps 1-11 and enter different property names in step 10.
Finally, as I Promised, here is the complete list of default profile properties get returned by the userprofileservice. I think they are pretty self explained:
UserProfile_GUID
AccountName
FirstName
LastName
PreferredName
WorkPhone
Office
Department
Title
Manager
AboutMe
PersonalSpace
PictureURL
UserName
QuickLinks
WebSite
PublicSiteRedirect
SPS-Dotted-line
SPS-Peers
SPS-Responsibility
SPS-Skills
SPS-PastProjects
SPS-Interests
SPS-School
SPS-SipAddress
SPS-Birthday
SPS-MySiteUpgrade
SPS-DontSuggestList
SPS-ProxyAddresses
SPS-HireDate
SPS-LastColleagueAdded
SPS-OWAUrl
SPS-ResourceAccountName
SPS-MasterAccountName
Assistant
WorkEmail
CellPhone
Fax
HomePhone
InfoPath – User Roles in Browser-Enabled Forms Using AD Groups
Posted by Clayton Cobb on July 19, 2009
MAJOR REVISION – Now using GetCommonMemberships web method to determine group memberships for users without needing to use contact lists or any other manual data source!
So, you need to restrict certain controls in your InfoPath form, but it’s browser-enabled, and you just found out that User Roles are not supported, huh? You also see that SharePoint permissions do not help restrict specific areas within your form, so what do you do? There are probably several methods, but here is the one I have come up with that uses all built-in functions of InfoPath and MOSS 2007 without any code and leverages Active Directory Security Groups.
Special thanks to a co-worker of mine – Irene Clark - who I taught to use the UserProfileService and subsequently figured out on her own that GetCommonMemberships could help with User Roles. She showed it to me, and I immediately jumped on it to come up with what you see here. Thank you very much, Irene!
Here is an outline of the steps with the assumption that you already have a working, browser-enabled form. If anyone needs me to write up the basic steps of doing creating a browser-enabled form from scratch, let me know via the Blog Request Log:
Fig 1 - GCM Node Structure
Grab the MembershipData repeating group onto the canvas and choose Repeating Table when prompted. This lays out the entire node structure nicely, although you will need to expand the table and the columns in order to clearly see the data (Fig 2).

Fig 2 – Full GCM Repeating Table Structure with Sample Data
In my opinion, certain fields are not useful to us due to either not having data or not having data that is useful for determining User Roles. I will delete the columns named Group Type, Privacy, ID, Member Group ID, and Group (Fig 3). Notice that Member Group ID does have some unique info, but I am not yet sure how to leverage that data. You may also want to remove the SourceInternal field from the MemberGroup section, because it shows the same GUID each time (at least in my system). As for the remaining fields, here are my notes so far:

Fig 3 – Partial GCM Table with Relevant Columns Only
If you ever plan to use this method for displaying a user’s list of group memberships, you may want to only show the DistributionList records. To do so, simply right click on the repeating table itself and create a conditional formatting rule that hides the control if the Source node is equal to “SharePointSite” in it (Fig 4). Interestingly, when going through the wizard to set this condition, the wizard automatically detected the available options for that node. I am used to seeing that with my main data source, but it does not always happen when referencing a secondary data source node. In this case, it helps to quickly choose the right selection without the potential for a syntax error. The result will be that you only see DistributionList records in the repeating table, which is the information that would be useful.

Fig 4 – Set Filter on GCM Table to Only Show AD groups
You may also at some point wish to show a user’s group memberships in a pulldown and then use a particular selection to trigger a rule or match some other condition elsewhere in the form. You may even use it to see another user’s memberships (other than the current user) and then select a group to then invoke the UserGroup web service (or possibly other available web services/methods similar to this) to enumerate the users in the group. That is outside the scope of this write-up, but it’s something to consider. To set up the dropdown, follow these steps:

Fig 5 – Dropdown Bound to Main Data Source and Showing GCM Group Data
Add Necessary Fields to Form Template, Create Layout, and Configure Default Values
First, manually create all the fields and groups you see below (Fig 6). Notice that strAdmin and strFinance have default values. Do not mimic these in your real form, because they will depend on your group names, which we’ll get to shortly.

Fig 6 – Data Structure
Next, we need to create our layout on the canvas (Fig 7). For this example, I just simply have two sections that are bound to grpAdmin and grpFinance (do not include their child fields), respectively, along with some text and a color for differentiation. I also have a repeating table bound to the MembershipData repeating group of the GetCommonMemberships method that is only showing the DisplayName element. This is only on the form for now to show what is happening, but it would not be on the form when using this concept unless you have some reason for showing the current user’s groups. You get this on the canvas by following the steps shown in Figures 2-4.
Fig 7 – Form Layout
After that, we need to assign our initial values that will play a part in the security of our form. For this exercise, we will use two Group Check Fields. This part is important, because this is what defines the group memberships in your form that will be leveraged for User Roles. I am using “Sharepoint Admins” and “Finance,” because those are the _exact_ words that show up in the DisplayName field of GetCommonMemberships (refer to Fig 2). In your case, you’ll want to add a field for each group that you want to define for your User Roles and set its default value accordingly:
Double-click the Administrators section on the canvas to get to its Properties, click the Display tab, then click Conditional Formatting and click Add
In the first field, click Select a field or group
In the Data Source pulldown, select the GetCommonMemberships secondary data source
Drill down the dataFields path until you get to DisplayName, which you should single-click
At the bottom of this box where it says Select, choose the phrase All occurrences of DisplayName, then click OK
For the Operand, choose are not equal to
In the last box, click the pulldown and choose Select a field or group, then choose strAdmin from the main data source
Lastly, in the Formatting area, check the box for Hide this control

Fig 8 – Conditional formatting to hide sections from unintended users
Finance Section – Do the same thing as with the Administrators Section except in the last box of the conditional formatting setup, choose strFinance. This will compare the current user’s list of group memberships with the exact name of the Finance security group, which is what we set the value of strFinance to be.
Now, it’s time to show it in action. In my scenario, I have two user accounts:
Clayton Cobb – I am in the Sharepoint Admins SG but not in Finance
SharePoint Tester – He is in the Finance SG but not in SharePoint Admins
I’ll start with SharePoint Tester being logged in (Fig 9) who will open a new browser form (Fig 10).
After saving the file as the SharePoint Tester, I will now log in as myself (Fig 11) and open the existing form (Fig 12).

Fig 11 – Clayton Cobb logged in
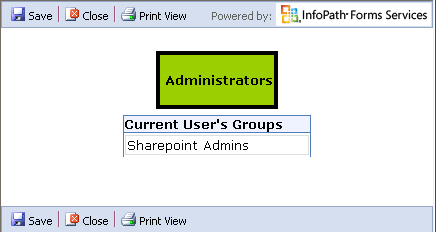
Fig 12 – My account only sees the Administrators section
**After it is all working, be sure to remove the repeating table from your form, or if you decide to show it for some reason, you may want to make that field read-only so that users can’t manually change it.
That’s all there is to it! You can now leverage Active Directory distributon lists and security groups for providing a mock User Roles functionality in Browser Forms without writing any code and while maintaining Domain Trust. The key here is that when looking at the same form, two separate users will see different information that is available based on their group memberships in Active Directory. Imagine the other ways you could leverage this by restricting individual controls, whole sections, or even entire views, which is very powerful!
REF: http://claytoncobb.wordpress.com/2009/07/19/infopath-user-roles-in-browser-enabled-forms-using-groups/
MAJOR REVISION – Now using GetCommonMemberships web method to determine group memberships for users without needing to use contact lists or any other manual data source!
So, you need to restrict certain controls in your InfoPath form, but it’s browser-enabled, and you just found out that User Roles are not supported, huh? You also see that SharePoint permissions do not help restrict specific areas within your form, so what do you do? There are probably several methods, but here is the one I have come up with that uses all built-in functions of InfoPath and MOSS 2007 without any code and leverages Active Directory Security Groups.
Special thanks to a co-worker of mine – Irene Clark - who I taught to use the UserProfileService and subsequently figured out on her own that GetCommonMemberships could help with User Roles. She showed it to me, and I immediately jumped on it to come up with what you see here. Thank you very much, Irene!
Here is an outline of the steps with the assumption that you already have a working, browser-enabled form. If anyone needs me to write up the basic steps of doing creating a browser-enabled form from scratch, let me know via the Blog Request Log:
- Add GetCommonMemberships data connection
- Add necessary fields to form template and configure them
- Add conditional formatting to applicable controls
User Profile Service – GetCommonMemberships Method
We must add this superb web service to our form template as a data connection. Please use the first 8 steps of Itay’s writeup to get this done as I can only give him credit for my extensive knowledge of this web service. Once you’ve added it successfully, we need to do a few things with it using the later steps in Itay’s blog. Here are the steps. They are only text with no screens, so I will just paste them here. Remember that we are leveraging a different web method than Itay, but it’s the same web service:
- With InfoPath opened go to Tools > Data Connections, and click ‘add…’ to add a new data connection to the form. This opens up the Data Connection Wizard.
- We want to receive data from the WS about the current user, so choose receive data’ and click next.
- Our data source is a WS so choose ‘Web Service’ and next.
- Now you will have to point the wizard to the WS. Type an address similar to this: http://ServerName/_vti_bin/UserProfileService.asmx and click next.
- Here you get a list of all methods for that WS, choose GetCommonMemberships and click next.
- In this screen you can specify what parameters are sent to the method, we are relying on the method’s ability to return the current user name if no value is passed to it, so we will leave this as is (no value is passed to the method) and click next.
- Click next and make sure ‘Automatically retrieve data when form is opened’ is checked.
- Finish the wizard.
In this solution, the GetCommonMemberships (GCM) method of the UserProfileService will provide the values we need to check a user’s Active Directory (AD) Security Group (SG) and Distribution List (DL) membership. This method also provides SharePoint (SP) Site membership, but that is not as useful as if it provided SP group membership, which it does not. I will be focusing only on the AD group memberships for this write-up. Here are some steps showing how to use and see what this method provides:
- View this method’s node structure
- Drag the whole repeating group to the canvas and preview to see the result
- Reduce the table to the most useful fields and decide which ones you want to leverage
- Filter to show only the AD groups
- Create a dropdown control bound to an element in your main data source that will show a selectable list of groups for a given user
- Use this information to apply conditional formatting on other controls
Notice that the node structure in the GCM method (Fig 1) is much more friendly than GetUserProfileByName. You can clearly see the information that is available, and the nodes are self-explanatory for the most part.

Fig 1 - GCM Node Structure
Grab the MembershipData repeating group onto the canvas and choose Repeating Table when prompted. This lays out the entire node structure nicely, although you will need to expand the table and the columns in order to clearly see the data (Fig 2).
Fig 2 – Full GCM Repeating Table Structure with Sample Data
In my opinion, certain fields are not useful to us due to either not having data or not having data that is useful for determining User Roles. I will delete the columns named Group Type, Privacy, ID, Member Group ID, and Group (Fig 3). Notice that Member Group ID does have some unique info, but I am not yet sure how to leverage that data. You may also want to remove the SourceInternal field from the MemberGroup section, because it shows the same GUID each time (at least in my system). As for the remaining fields, here are my notes so far:
- Source: This shows whether or not the record is an AD group (noted as “DistributionList”) – or a SharePoint site membership (noted as “SharePointSite”). Notice, these are not SharePoint groups, but rather site memberships and only where the user has been specifically added to that site with permissions as opposed to inherting permissions through AD SG membership. The AD groups include both SGs and DLs, which is important to know.
- Member Group – Source Reference: This shows the Organizational Unit path in Active Directory of the DistributionLists and shows a GUID for SharePointSites.
- Display name: This is the Display Name of the group as defined in AD. In Outlook, this name can typically be used as an addressee for an email, and the name will resolve to the email address. This name SHOULD be unique and will be what we use for our User Role matching later. For SharePointSites, this is just the site name.
- Mail NickName: This is the alias for that group in AD, and it also will resolve to the email address when used in Outlook. However, I found in my system that there were _two_ separate contacts in the GAL with the same alias. That should not happen, and I will be notifying the AD admins, but the fact that it did happen with a common SG I use means it is not a guarantee, so be wary of that. The same could potentially happen for Display Name, but that is a much longer and more specific name while aliases are sometimes just a few letters. There is no nickname for SharePointSites.
- URL: This is the direct email address for the group in the form of mailto:name@domain.com. This also could be a very good source for matching groups and/or for sending emails. Again, the email address SHOULD be unique, but that all depends on how well your AD is maintained. For SharePointSites, it shows the URL to the site.
Fig 3 – Partial GCM Table with Relevant Columns Only
If you ever plan to use this method for displaying a user’s list of group memberships, you may want to only show the DistributionList records. To do so, simply right click on the repeating table itself and create a conditional formatting rule that hides the control if the Source node is equal to “SharePointSite” in it (Fig 4). Interestingly, when going through the wizard to set this condition, the wizard automatically detected the available options for that node. I am used to seeing that with my main data source, but it does not always happen when referencing a secondary data source node. In this case, it helps to quickly choose the right selection without the potential for a syntax error. The result will be that you only see DistributionList records in the repeating table, which is the information that would be useful.
Fig 4 – Set Filter on GCM Table to Only Show AD groups
You may also at some point wish to show a user’s group memberships in a pulldown and then use a particular selection to trigger a rule or match some other condition elsewhere in the form. You may even use it to see another user’s memberships (other than the current user) and then select a group to then invoke the UserGroup web service (or possibly other available web services/methods similar to this) to enumerate the users in the group. That is outside the scope of this write-up, but it’s something to consider. To set up the dropdown, follow these steps:
- Create a text data element in your main data source with whatever name you prefer
- Drag that field to the canvas, which makes a text box
- Right-click that box and change it to a Drop-down List Box
- Double-click the dropdown to get to its properties (Fig 5)
Select the radio button that says, “Look up values from an external data source“
For the Data Source, choose GetCommonMemberships
For Entries, click the button, drill down through the groups, and select the MembershipData repeating group
For Value, choose whatever node you prefer as your primary key (unique value). DisplayName, Nickname, and URL are all suitable.
For Display Name, choose the DisplayName node - Click OK until done and preview the form. You should see the friendly names of your groups all listed in the dropdown. Since this is a browser form, we cannot filter the dropdown (at least until we get SharePoint 2010!), so you will see the SharePointSites, too.
Fig 5 – Dropdown Bound to Main Data Source and Showing GCM Group Data
Add Necessary Fields to Form Template, Create Layout, and Configure Default Values
First, manually create all the fields and groups you see below (Fig 6). Notice that strAdmin and strFinance have default values. Do not mimic these in your real form, because they will depend on your group names, which we’ll get to shortly.
Fig 6 – Data Structure
Next, we need to create our layout on the canvas (Fig 7). For this example, I just simply have two sections that are bound to grpAdmin and grpFinance (do not include their child fields), respectively, along with some text and a color for differentiation. I also have a repeating table bound to the MembershipData repeating group of the GetCommonMemberships method that is only showing the DisplayName element. This is only on the form for now to show what is happening, but it would not be on the form when using this concept unless you have some reason for showing the current user’s groups. You get this on the canvas by following the steps shown in Figures 2-4.
Fig 7 – Form Layout
After that, we need to assign our initial values that will play a part in the security of our form. For this exercise, we will use two Group Check Fields. This part is important, because this is what defines the group memberships in your form that will be leveraged for User Roles. I am using “Sharepoint Admins” and “Finance,” because those are the _exact_ words that show up in the DisplayName field of GetCommonMemberships (refer to Fig 2). In your case, you’ll want to add a field for each group that you want to define for your User Roles and set its default value accordingly:
- strAdmin – Set the default value to the text “Sharepoint Admins” (no function used)
- strFinance – Set the default value to the text “Finance”
- Remember, please use proper values for your environment based off what you see in your equivalent of Figure 2 above
Add Conditional Formatting to Sections
Double-click the Administrators section on the canvas to get to its Properties, click the Display tab, then click Conditional Formatting and click Add
In the first field, click Select a field or group
In the Data Source pulldown, select the GetCommonMemberships secondary data source
Drill down the dataFields path until you get to DisplayName, which you should single-click
At the bottom of this box where it says Select, choose the phrase All occurrences of DisplayName, then click OK
For the Operand, choose are not equal to
In the last box, click the pulldown and choose Select a field or group, then choose strAdmin from the main data source
Lastly, in the Formatting area, check the box for Hide this control
Fig 8 – Conditional formatting to hide sections from unintended users
Finance Section – Do the same thing as with the Administrators Section except in the last box of the conditional formatting setup, choose strFinance. This will compare the current user’s list of group memberships with the exact name of the Finance security group, which is what we set the value of strFinance to be.
Now, it’s time to show it in action. In my scenario, I have two user accounts:
Clayton Cobb – I am in the Sharepoint Admins SG but not in Finance
SharePoint Tester – He is in the Finance SG but not in SharePoint Admins
I’ll start with SharePoint Tester being logged in (Fig 9) who will open a new browser form (Fig 10).
After saving the file as the SharePoint Tester, I will now log in as myself (Fig 11) and open the existing form (Fig 12).
Fig 11 – Clayton Cobb logged in
Fig 12 – My account only sees the Administrators section
**After it is all working, be sure to remove the repeating table from your form, or if you decide to show it for some reason, you may want to make that field read-only so that users can’t manually change it.
That’s all there is to it! You can now leverage Active Directory distributon lists and security groups for providing a mock User Roles functionality in Browser Forms without writing any code and while maintaining Domain Trust. The key here is that when looking at the same form, two separate users will see different information that is available based on their group memberships in Active Directory. Imagine the other ways you could leverage this by restricting individual controls, whole sections, or even entire views, which is very powerful!
REF: http://claytoncobb.wordpress.com/2009/07/19/infopath-user-roles-in-browser-enabled-forms-using-groups/
Default Conditions and Actions available in SPD list
Conditions
Compare
FieldAllows you to specify a value for a column in the list this workflow is attached to. If the payload item has that value in the specified column, then this step will process.
Compare Any Data Source
Allows you to specify a set of values to be compared. Each value can contain either a hard-coded value or a lookup to another list on the site. See the section
Title Field Contains Keyword
Allows you to specify a value to look for in the Title column. If the current list item has that value in the title, then this step will process.
Modified in a Specific Date Span
Allows you to specify begin and end dates for when the list item was modified. If the current list item was modified within this span, then this step will process.
Modified by a Specific Person
Allows you to specify the name of a person. If that person modified the list item, this step will execute.
Created in a Specific Date Span
Same as Modified in a Specific Date Span but works off the list item creation date.
Created by a Specific Person
Same as Modified by a Specific Person but works off the original list item creator, not the last modifier.
The File Type Is a Specific Type
Allows you to specify a certain type of file. If the file payload matches this file extension, the step will process
The File Size in a Specific Range
Allows you to specify a range of kilobytes. If the file of Kilobytes payload falls within this range, the step will process.
-----------------------------------------------------------------------------------------
Actions
Add Time to Date
Allows you to work with date values and store the result in a variable. You can add (or subtract, by indicating a negative value) time (minutes, hours, days, months, or years) to a specified date and store the result in either an existing variable or in a new variable created in this step.
Assign a Form to a Group
Launches a custom wizard that allows you to easily build a form to collect information from users. The wizard is similar to the Variables Editor discussed in a moment. You can indicate which users are assigned the survey as part of the configuration for this action.
Assign a To-do Item
Launches a dialog box that allows you to specify the parameters for creating a simple task for a specified user.
Build Dynamic String
Configure this step to create a string value and assign it to a variable. The string value can contain values retrieved from the current workflow instance by using lookups. We discuss lookups later in this chapter. The variable used to store the string value can be either preexisting or created as part of this action.
Check In Item
Checks in an item so other users can edit it. You can specify Current Item or provide a column name and value to identify which item to check in. Also allows you to specify a check-in comment, which can be either hard-coded or set via a workflow lookup.
Check Out Item
Checks out an item so other users cannot edit it. You can specify Current Item or provide a column name and value to identify which item to check out.
Collect Data from a User
Creates and assigns a task to the specified user. Tasks are used to collect specific information from the assigned user or to have the user complete a process. The ID of the task is stored in a variable so that the information from that task is available later in the workflow via a workflow lookup. Configuring this action will launch the custom task wizard, which is similar to the Variables Editor discussed in a moment. This action is similar to the Assign a To-Do Item action, but allows you to collect information for later use instead of just creating a task.
Copy List Item
Creates an exact duplicate of an existing list item in a different list on the current site. You specify both the source and destination lists. You can specify Current Item or provide a column name and value to identify which item to copy.
Create List Item
Creates a new list item in any list on the current site. You specify the list as well as values for all necessary columns. Values can either be hard-coded or based on a workflow lookup.
Delete Item
Deletes an item from a list on the current site. You can specify Current Item or provide a column name and value to identify which item to delete.
Discard Check Out Item
Pretty self-explanatory, but this allows you to undo the checkout of an item. All changes to that item will be lost.
Do Calculation
Performs a simple calculation (plus, minus, multiply, divide, modulo) with two values, which you can either specify or base on a workflow lookup. The results of the calculation are stored in a variable. Typically, this variable would be one created specifically for this workflow.
Log to History List
Allows you to write an entry to the designated history list for this workflow instance. You can use either fixed text or a workflow lookup value (but not both) as the text to be written.
Pause for Duration
Allows you to specify that the workflow should suspend processing for a time period you specify (in days, hours, and minutes) when you configure this action.
Pause Until Date
Similar to the previous action, except that you configure a specific date on which to continue processing the workflow.
Send an Email
Sends an email when it is executed. The action can be customized to specify the recipient, CC, subject, and body of the message. Each of these fields can be either hard-coded or based on formulas, lookups, or workflow variables.
Set Content Approval Status
Allows you to specify the current status of the payload item. You can also specify comments, but keep in mind that those comments will be the same for every instance of this workflow unless you use lookups.
Set Field in Current Item
Allows you to set the value of a specific column in the payload item to a specified value. You can specify this value with either fixed text or a workflow lookup value (but not both).
Set Time Portion of Date/Time Field
Similar to the Add Time to Date action, except that you specify a specific value for hours and minutes (i.e., not a relative time—plus 5 minutes from when the action executes) and store the results in a variable.
Set Workflow Variable
Sets a variable for this workflow to a specified value. The value can be either hard-coded or set via a workflow lookup. You can reference a previously created variable or create a new one.
Stop Workflow
Causes the workflow to stop processing. You can specify text to be logged to the history list with either fixed text or a lookup.
Update List Item
Updates one or more existing columns in one or more lists. You can specify the list(s), the column(s), and the value(s). You can also specify Current Item to indicate the item that triggered the current workflow instance.
Wait for Field Change in Current Item
Pauses the workflow until the specified column for this item from the attached SharePoint list equals the value specified. The value can be hard-coded or based on a workflow lookup.
Creating Permanent SharePoint Designer Workflow Audit Trails
Overview: Workflow Audit Trails
Just about any important workflow solution requires an audit trail. We want to know who approved a particular document and when. We want to know when a task was assigned to someone and when they completed it. We leave debugging style messages in our workflow so that we can go back, after the fact, and understand who did what and when they did it so that we can improve the process. There are many good reasons to leave behind audit information.
SharePoint Designer makes this easy with the “log to history” action. This little action allows us to save just about any message we want to the workflow history.
There is a terrible flaw in this, however. Out of the box, workflow history is not permanent.
SharePoint runs a process every day that looks for and purges data from all workflow history lists. This process removes any item which is more than 60 days old! This can be a terrible shock, particularly when you’ve built a business solution that requires a long term audit trail, such as approvals on financial transactions or security requests for systems access. Even if you don’t have a strong requirement, legal or otherwise for an audit trail, it’s still nice to have that audit trail.
Why does SharePoint do this? There’s a good technical reason and it relates to the famous “2000 item limit.” Microsoft recommends that a given list or document library should normally only show 2000 items at a time. After that, SharePoint’s overall performance can degrade and hurt the end user experience. At the same time, SharePoint workflow history is actually a list, just like any other list. It’s a hidden list, so you can’t see from “view all content,” but it’s a list. As a result, it needs to conform to the same 2,000 item guideline. Microsoft solves this by purging the data from the list by arbitrarily deleting older entries.
So, Microsoft solves the technical problem for us, but we’re level with a business problem. How do we solve this? There are at least five approaches.
Solution One: Live With It
The most obvious solution is to simply live with it. This is a no-cost option and if you don’t need a permanent audit trail, you’re better off allowing SharePoint to purge it anyway. Sixty days is a pretty good default window.
Solution Two: Re-configure the SharePoint Job
Like so many options in SharePoint, the 60 day window is itself configurable. If 60 days is too short, increase it to 90 days or 365 days or whatever is required. We do this using stsadm. This technet article describes this in a little more detail: http://technet.microsoft.com/en-us/library/cc424956.aspx
There is a problem with this approach. If you disable this process altogether, or set the window to something very long (10 years, for example), your workflow history list will grow and grow and … grow. And this causes problems by itself. If it grows into 1000’s and 10’s of thousands of entries (or even larger), performance will probably degrade. It could even become uselessly slow. I don’t have personal experience with it, but keep this problem in mind.
Solution Three: Use a Custom List
Last week, I wrote about using a custom list to create flexible workflow solutions. Instead of hard coding data in a list (such an approver’s email address), instead pull those values out of the workflow and save them in a custom list. At run-time, the workflow looks up the value in that custom list. That way, if someone changes jobs, all you need to do is update the custom list. You don’t need to use SharePoint designer for that purpose.
If we can a custom list to extract data, we can also use a custom list to save an audit history. Instead of using “log to history” we can use “create list item” actions to create our own audit trail with our own audit information. This gives us full control over when and how this audit information is purged (if ever).
We still have a 2,000 item guideline problem. But now we have the power. With that power comes responsibility and all that, but at least it’s in our hands.
I plan to write up a fully functioning example of this in the next week or two.
Solution Four: Embed audit history in the data
This is a bit of a special case. I had the opporuntity to work with a client that used an InfoPath form in conjunction with a workflow process to manage on-boarding new hires. The InfoPath form used an “administrator view” to capture and provide a single view of audit data. As the workflow progressed through its steps, it would record the who/when bits and save them directly onto the form.
The advantage here is that the form becomes both a place to enter some data, but also its own audit trail. The audit trail survives as long as the form itself survives.
A similar approach could be taken with a custom list or document library, although you need to get a little clever if there are complex auditing requirements.
The downside to this is that the data could be “adjusted” by someone with the right privileges and that can defeat the purpose of an audit trail in the first place. Normally, we want our audit trails to be write-once and read-forever. This is more difficult to accomplish when the form itself stores the audit data.
Solution Five: Use Built-in SharePoint Auditing
Lastly, use SharePoint’s built it auditing capability.
SharePoint provides a rich auditing capability. See here for all the gory details: http://technet.microsoft.com/en-us/library/cc424956.aspx
There’s a lot of material in there, but the key takeaways are:
Conclusion
One way of looking at SharePoint Designer workflow and auditing is that, frankly, it sets us up to fail. Many people don’t realize that potentially precious audit messages are purged after 60 days. SharePoint Designer doesn’t warn us that this is going to happen. SharePoint itself doesn’t give us any clue. There ought to be warning messages all over the place because it’s perfectly natural to assume that workflow history is going to be permanent.
In this case, SharePoint gives us auditing with one hand, takes it away with another, but thankfully, gives it back to us with one or more of the solutions described in this article.
If you’ve been blithely assuming that your workflow audits are safe, they are not. If you need those audit trails, plan on designing a solution sooner rather than later, because the clock is ticking.
Postscript
You can see my MindJet Mindmap for this article here: Auditing Workflows.pdf
REF: http://www.endusersharepoint.com/2009/01/27/creating-permanent-sharepoint-designer-workflow-audit-trails/
Just about any important workflow solution requires an audit trail. We want to know who approved a particular document and when. We want to know when a task was assigned to someone and when they completed it. We leave debugging style messages in our workflow so that we can go back, after the fact, and understand who did what and when they did it so that we can improve the process. There are many good reasons to leave behind audit information.
SharePoint Designer makes this easy with the “log to history” action. This little action allows us to save just about any message we want to the workflow history.
There is a terrible flaw in this, however. Out of the box, workflow history is not permanent.
SharePoint runs a process every day that looks for and purges data from all workflow history lists. This process removes any item which is more than 60 days old! This can be a terrible shock, particularly when you’ve built a business solution that requires a long term audit trail, such as approvals on financial transactions or security requests for systems access. Even if you don’t have a strong requirement, legal or otherwise for an audit trail, it’s still nice to have that audit trail.
Why does SharePoint do this? There’s a good technical reason and it relates to the famous “2000 item limit.” Microsoft recommends that a given list or document library should normally only show 2000 items at a time. After that, SharePoint’s overall performance can degrade and hurt the end user experience. At the same time, SharePoint workflow history is actually a list, just like any other list. It’s a hidden list, so you can’t see from “view all content,” but it’s a list. As a result, it needs to conform to the same 2,000 item guideline. Microsoft solves this by purging the data from the list by arbitrarily deleting older entries.
So, Microsoft solves the technical problem for us, but we’re level with a business problem. How do we solve this? There are at least five approaches.
Solution One: Live With It
The most obvious solution is to simply live with it. This is a no-cost option and if you don’t need a permanent audit trail, you’re better off allowing SharePoint to purge it anyway. Sixty days is a pretty good default window.
Solution Two: Re-configure the SharePoint Job
Like so many options in SharePoint, the 60 day window is itself configurable. If 60 days is too short, increase it to 90 days or 365 days or whatever is required. We do this using stsadm. This technet article describes this in a little more detail: http://technet.microsoft.com/en-us/library/cc424956.aspx
There is a problem with this approach. If you disable this process altogether, or set the window to something very long (10 years, for example), your workflow history list will grow and grow and … grow. And this causes problems by itself. If it grows into 1000’s and 10’s of thousands of entries (or even larger), performance will probably degrade. It could even become uselessly slow. I don’t have personal experience with it, but keep this problem in mind.
Solution Three: Use a Custom List
Last week, I wrote about using a custom list to create flexible workflow solutions. Instead of hard coding data in a list (such an approver’s email address), instead pull those values out of the workflow and save them in a custom list. At run-time, the workflow looks up the value in that custom list. That way, if someone changes jobs, all you need to do is update the custom list. You don’t need to use SharePoint designer for that purpose.
If we can a custom list to extract data, we can also use a custom list to save an audit history. Instead of using “log to history” we can use “create list item” actions to create our own audit trail with our own audit information. This gives us full control over when and how this audit information is purged (if ever).
We still have a 2,000 item guideline problem. But now we have the power. With that power comes responsibility and all that, but at least it’s in our hands.
I plan to write up a fully functioning example of this in the next week or two.
Solution Four: Embed audit history in the data
This is a bit of a special case. I had the opporuntity to work with a client that used an InfoPath form in conjunction with a workflow process to manage on-boarding new hires. The InfoPath form used an “administrator view” to capture and provide a single view of audit data. As the workflow progressed through its steps, it would record the who/when bits and save them directly onto the form.
The advantage here is that the form becomes both a place to enter some data, but also its own audit trail. The audit trail survives as long as the form itself survives.
A similar approach could be taken with a custom list or document library, although you need to get a little clever if there are complex auditing requirements.
The downside to this is that the data could be “adjusted” by someone with the right privileges and that can defeat the purpose of an audit trail in the first place. Normally, we want our audit trails to be write-once and read-forever. This is more difficult to accomplish when the form itself stores the audit data.
Solution Five: Use Built-in SharePoint Auditing
Lastly, use SharePoint’s built it auditing capability.
SharePoint provides a rich auditing capability. See here for all the gory details: http://technet.microsoft.com/en-us/library/cc424956.aspx
There’s a lot of material in there, but the key takeaways are:
- MOSS provides a better all-around solution over WSS.
- It’s not a particularly end user friendly solution, especially on the WSS side.
- It’s permanent.
- It’s transportable. If you upgrade hardware or carry out a wide variety of backend administrative tasks, your audit history will travel with you.
- It’s extensible by way of programming. It’s not extensible in an end user friendly way, but if you partner up with your developer colleagues, you have a lot of good options.
Conclusion
One way of looking at SharePoint Designer workflow and auditing is that, frankly, it sets us up to fail. Many people don’t realize that potentially precious audit messages are purged after 60 days. SharePoint Designer doesn’t warn us that this is going to happen. SharePoint itself doesn’t give us any clue. There ought to be warning messages all over the place because it’s perfectly natural to assume that workflow history is going to be permanent.
In this case, SharePoint gives us auditing with one hand, takes it away with another, but thankfully, gives it back to us with one or more of the solutions described in this article.
If you’ve been blithely assuming that your workflow audits are safe, they are not. If you need those audit trails, plan on designing a solution sooner rather than later, because the clock is ticking.
Postscript
You can see my MindJet Mindmap for this article here: Auditing Workflows.pdf
REF: http://www.endusersharepoint.com/2009/01/27/creating-permanent-sharepoint-designer-workflow-audit-trails/
Subscribe to:
Posts (Atom)